Reading Time: 6 mins.
Overview
Docker Virtualization, known for its simple and convenient way of deploying applications is the best-to-go option for every developer and organisation. With its container-based technology, and built-in features such as docker-compose, docker images, docker volumes, docker hub and so on, it has further streamlined the development process as you can define the infrastructure along with volumes, networks and applications in a single file. Also, it offers the flexibility to run multiple applications on the provided host or directly executing the container within the host environment per se.
Here, in this article, a basic working environment will be created by setting Nginx as a web server and MySQL as the database, all within separate Docker containers. The entire stack including the config. files such as PHP, Nginx and MySQL will be defined in the docker-compose file.
Prerequisites
- A Ubuntu 18.04 server with sudo (non-root user) privileges.
- Installed Docker and Docker Compose, if you haven’t installed yet, go to How to Install Docker on Ubuntu 18.04
Step 1: Creating the project folders
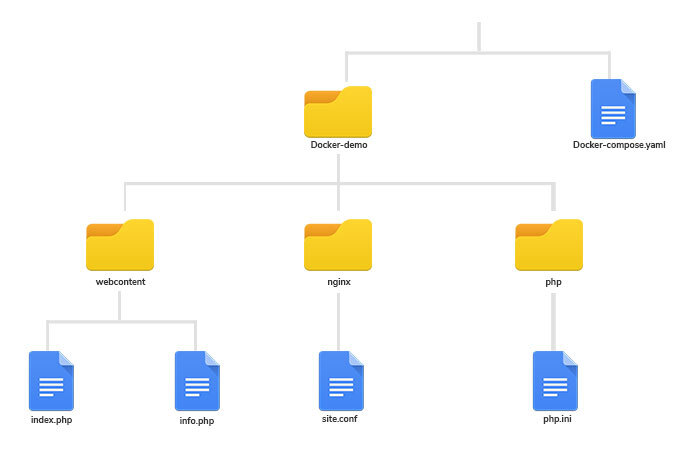
You need to create the following files and directories to get started with the demo project.
Folder Overview:
Step 2: Creating the required config. files
i) Nginx site configuration
Get started with the nginx folder using the command below
cd Docker-demo/nginx
Next, open the file, site.conf using the below command.
sudo nano Docker-demo/nginx/site.conf
server {
    server_name docker-demo.com;
    root /var/www/html;
    index index.php index.html index.htm;
    access_log /var/log/nginx/access.log;
    error_log /var/log/nginx/error.log;
    location / {
        try_files $uri $uri/ /index.php?$query_string;
    }
    # PHP-FPM Configuration Nginx
    location ~ \.php$ {
        try_files $uri = 404;
        fastcgi_split_path_info ^(.+\.php)(/.+)$;
        fastcgi_pass php:9000;
        fastcgi_index index.php;
        include fastcgi_params;
        fastcgi_param REQUEST_URI $request_uri;
        fastcgi_param SCRIPT_FILENAME $document_root$fastcgi_script_name;
        fastcgi_param PATH_INFO $fastcgi_path_info;
    }
}
Note: It is the fastcgi_pass php:9000; that guides Nginx on how to connect with PHP containers.
ii) Creating index.php file:
To get started with the webcontent folder, type:
cd Docker-demo/webcontent
Next create a file called index.php
sudo touch index.php
To open the created index.php file, type:
sudo nano index.php
<!doctype html>
<style>
  body { text-align: center; padding: 150px;background-color:blue }
  h1 { text-align:center;font-size: 25px;color:white  }
  body { font: 16px Helvetica, sans-serif; color: #333; }
  article { display: block; text-align: left; width: 650px; margin: 0 auto; }
  a { color: #DC8100; text-decoration: none; }
  a:hover { color: #333; text-decoration: none; }
</style>
<article>
    <h1>Welcome to Docker-demo project</h1>
    <h1>We have installed Nginx , Php-fpm and Mysql</h1>
</article>
iii) Creating php.ini file:
Since the php.ini file copied to the php container is used here, we can straightway make changes in the php.ini file. Post then just restart the container for the changes to get applied.
In case, if you make changes within the php code of the index.php file, you need not to restart the container. All the changes will immediately get applied once the browser page reloads. Here, “depends_on” – restricts the container from running before other container (on which it depends on)
Step 3: Creating docker-compose yaml file
In the docker yaml file, we are going to integrate the following services,
- Nginx
- PHP
- MySQL
Next, open the yaml file using the below command.
sudo nano docker-compose.yml
version: '3'
services:
 # Nginx server configuration
  web:
    image: nginx:1.17
    container_name: webserver
    depends_on:
      - docker-mysql
      - php
    links:
      - docker-mysql
      - php
    volumes:
      - ./webcontent:/var/www/html
      - ./nginx:/etc/nginx/conf.d/
    ports:
      - "8080:80"
 # Php-fpm configuration
  php:
    image: php:7.2-fpm
    volumes:
      - ./webcontent:/var/www/html
      - ./php:/usr/local/etc/php/php.ini
 # Mysql configuration
  docker-mysql:
    image: mysql:5.7
    container_name: docker-mysql-demo
    restart: always
    environment:
        - MYSQL_DATABASE=docker_demo
        - MYSQL_ROOT_PASSWORD=root123
        - MYSQL_USER=root
        - MYSQL_PASSWORD=root123
    ports:
        - "3306:3306"
    volumes:
        - /dbdata:/var/lib/mysql
Note: Make sure that you stick with the syntax to avoid errors as the docker yaml file is case sensitive.
Step 4: Proceeding with data persistence
Docker comes with a number of flexible features that ensure that every other required task can be done within the Docker software itself. One such powerful offering is Docker Volumes where you can persist (save data) the database, config files, applications, etc. In simple words, Docker Volumes helps in back up and persistence beyond the container’s lifecycle.
Now to get started with the MySQL database persistence using Docker Volume, go to docker-compose file wherein under the db service define a volume called dbdata.
Next add dbdata in the docker-compose yaml file as shown below:
volumes:
  dbdata:
Note: Include these lines at the end of the docker yaml file. Once you have included it, it will look like the following code.
 # Mysql configuration
  docker-mysql:
    image: mysql:5.7
    container_name: docker-mysql-demo
    restart: always
    environment:
        - MYSQL_DATABASE=docker_demo
        - MYSQL_ROOT_PASSWORD=root123
        - MYSQL_USER=root
        - MYSQL_PASSWORD=root123
    ports:
        - "3306:3306"
    volumes:
        - /dbdata:/var/lib/mysql
volumes:
  Dbdata:
Step 5: Running the docker container
First, we will run the docker yaml file using docker-compose followed by checking the docker container status, port and shell access.
Let’s run the yaml file, and it can be achieved via two commands.
i) Docker-compose up
We can run the docker yaml file using the Docker-compose up command but it will end up displaying increased logs or verbose.
ii) Docker-compose up -d
This Docker-compose up -d command helps you to quickly run the docker-compose yaml file without displaying any verbose.
Here, we are proceeding with the latter command.
Docker-compose up -d
Note: If you already have the images, you can directly use it in Docker. If not, download the image using the pull command from Docker Hub.
demo@user:~/home/test/Docker-demo$ docker-compose up -d
Output
Pulling php (php:7.2-fpm)...
7.2-fpm: Pulling from library/php
6ec8c9369e08: Pull complete
081a822af595: Pull complete
bb5bea655fca: Pull complete
1e5d9e6a44c7: Pull complete
b80bd0206e9a: Pull complete
bfb5a20e684a: Pull complete
23e1412dbc42: Pull complete
e4ef974d5fe7: Pull complete
9be689db73a4: Pull complete
79c3308fcac3: Pull complete
90214107f387: Pull complete
Digest: sha256:d79ee8b9ac56c5fe206552b37ba42fc1ee38b59213817d15fbb3444e93778605
Status: Downloaded newer image for php:7.2-fpm
Pulling web (nginx:1.17)...
1.17: Pulling from library/nginx
afb6ec6fdc1c: Already exists
b90c53a0b692: Pull complete
11fa52a0fdc0: Pull complete
Digest: sha256:6fff55753e3b34e36e24e37039ee9eae1fe38a6420d8ae16ef37c92d1eb26699
Creating docker-mysql-demo ... done
Creating test_php_1         ... done
Creating webserver       ... done
Post downloading the image from Docker Hub, the Docker containers will automatically be up and running.
Note – If the image is already in local you will get a following output directly
demo@user:~/home/user/Docker-demo$ docker-compose up -d
Output
Starting test_php_1 ... done
Starting docker-mysql-demo ... done
Starting webserver        ... done
To check the docker container status, type:
demo@user:~/home/user/Docker-demo$ docker ps -a
Output
CONTAINER ID        IMAGE               COMMAND                  CREATED             STATUS              PORTS                               NAMES
db260bdd50db        nginx:1.17          "nginx -g 'daemon of…"   9 minutes ago       Up 9 minutes        0.0.0.0:8080->80/tcp                webserver
d779a91f0a70        mysql:5.7           "docker-entrypoint.s…"   9 minutes ago       Up 9 minutes        0.0.0.0:3306->3306/tcp, 33060/tcp   docker-mysql-demo
a934abeff223        php:7.2-fpm         "docker-php-entrypoi…"   9 minutes ago       Up 9 minutes        9000/tcp                            test_php_1
To check the docker image status, type:
Docker images -a
Output
REPOSITORY           TAG                IMAGE ID            CREATED           SIZE
php                 7.2-fpm             bf06dbdd13ab        7 days ago        398MB
mysql                  5.7                 9cfcce23593a        7 weeks ago     448MB
nginx                 1.17                9beeba249f3e        2 months ago    127MB
Step 6: Adding domain to etc hosts
Either you need to add a container ip address or localhost url in etc hosts. Here, we are going with the localhost url.
Open the etc file using the following command.
sudo nano /etc/hosts
127.0.0.1 docker-demo.com
Note: Include the same domain, docker-demo.com as you used in the nginx site configuration.
Step 7: Verification
To directly access the docker container shell, enter the below command.
Docker exec -it webserver bash
Hit the localhost domain which you have added in etc hosts. http://docker-demo.com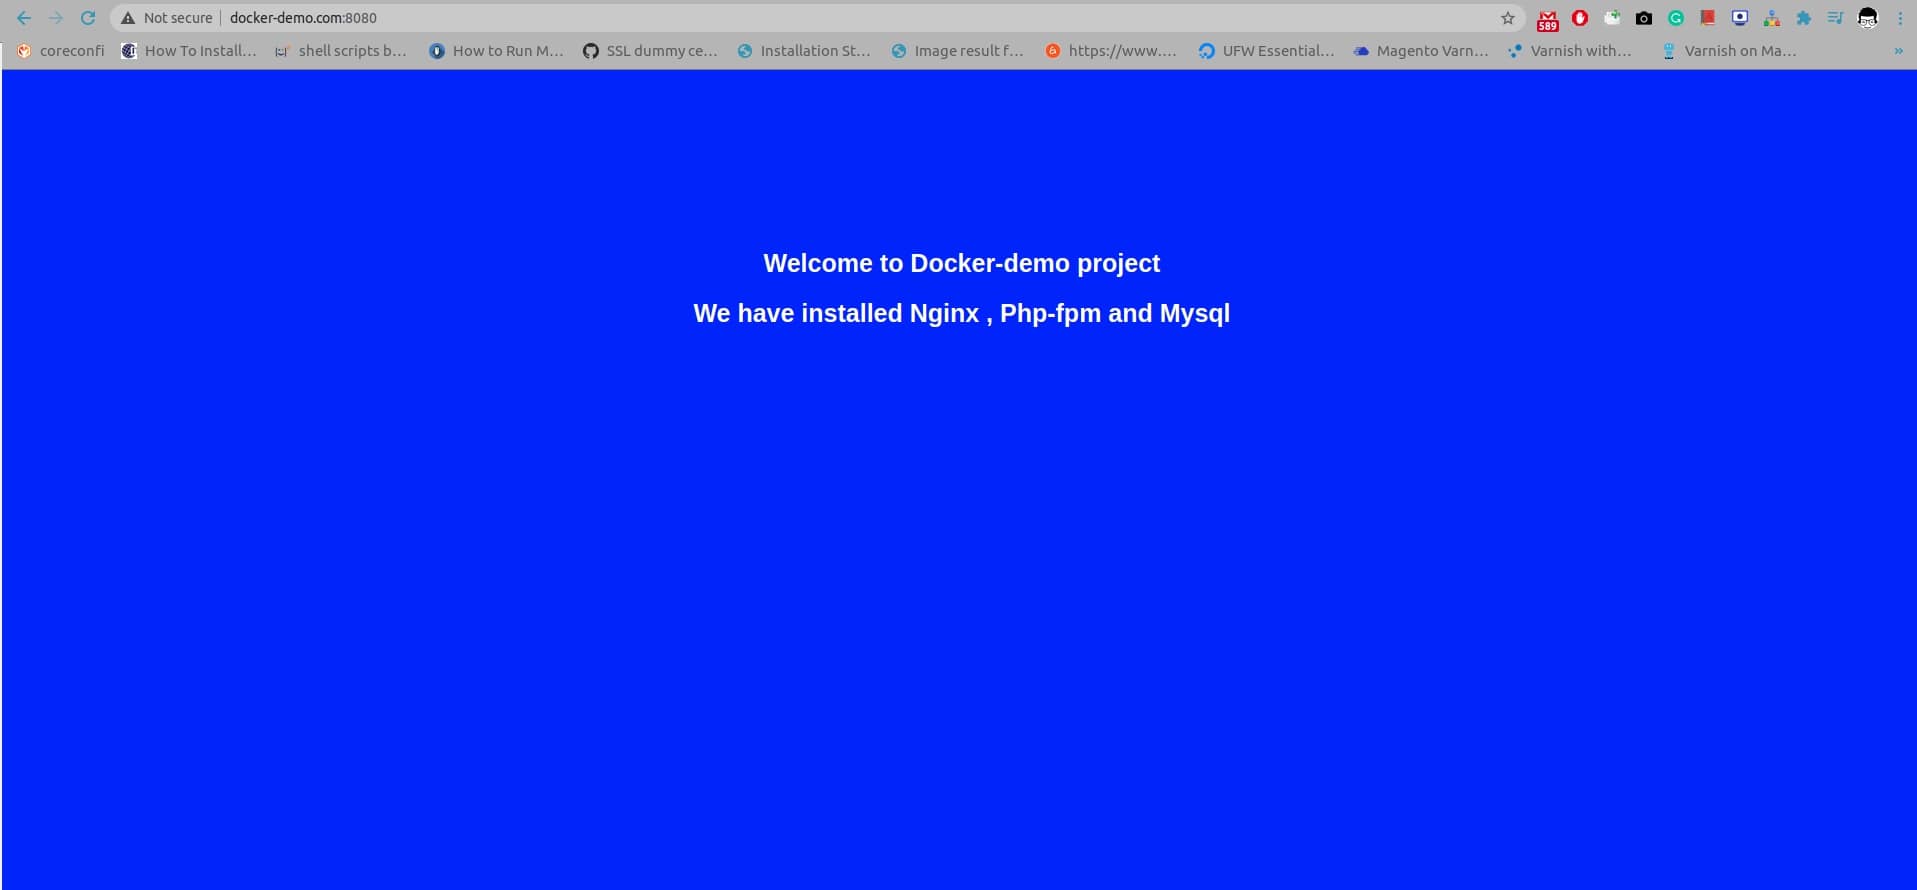
Conclusion
Just to emphazise, if you have noticed, it is the Docker that plays a vital role in simplifying the development process. Want to read more about Docker and its number of capabilities, read our blog post on A Brief Introduction to Docker and Its Terminologies Setting up a stack with Nginx as a web server and MySQL as the database with required PHP config. files is not an easy and one-step process. With Docker Compose which allows you to create multiple containers, you can define the infrastructure along with the required config. files within a single file using a single command.