Table of contents:
- Introduction
- Prerequisites
- Step 1: Install Minikube
- Step 2: Start Minikube Cluster
- Step 3: Interact with Your Minikube Cluster
- Step 4: Deploy Applications
- Step 5: Frequently Used kubectl Commands
- Step 6: Running Docker Images in a Minikube Cluster
- Conclusion
Introduction
Minikube is an indispensable tool for developers and DevOps engineers who want to experiment with Kubernetes without the need for a full-fledged cluster. It allows you to set up a single-node Kubernetes cluster on your local machine, making it easier to develop, test, and deploy containerized applications. In this guide, we’ll walk you through the process of setting up a Minikube cluster, including all the prerequisites and necessary steps.
Prerequisites
Before you dive into setting up Minikube, make sure you have the following prerequisites in place:
Virtualization Software: Minikube relies on a virtualization driver to create a virtual machine for your cluster. You can choose between VirtualBox, docker or KVM.
kubectl: Install the Kubernetes command-line tool, kubectl, on your local machine. This is essential for interacting with your Minikube cluster. refer installing kubectl
Minikube: Download and install the Minikube binary from the official Minikube GitHub releases page: Download minikube
Setting Up Minikube
Step 1: Install Minikube
To download the Minikube binary, utilize the curl command.
curl -LO https://github.com/kubernetes/minikube/releases/download/v1.31.2/minikube-linux-amd64
To make the binary executable, execute the following command:
chmod +x <Downloaded filename>
To ensure the binary is accessible from any location on your system, move it to a directory in your system’s PATH, such as /usr/local/bin.
mv <Downloaded filename> minikube
sudo mv minikube /usr/local/bin/
Step 2: Start Minikube Cluster
i) Install the virtualization driver ‘kvm’ for Minikube.
sudo apt update
sudo apt-get install qemu-kvm libvirt-daemon-system libvirt-clients bridge-utils
sudo adduser `id -un` libvirt
sudo adduser `id -un` kvm
After entering the above command, logout and login again for the changes to take effect
ii) After kvm installation, run the below command to check kvm is supported for your pc,
kvm-ok
Output:
└─$kvm-ok
INFO: /dev/kvm exists
KVM acceleration can be used
iii) Open a terminal and start Minikube with your chosen virtualization driver. For kvm, the command would be:
minikube start --driver=kvm
Minikube will download the Kubernetes ISO and create a virtual machine for your cluster. This process might take a few minutes.
Note: Replace kvm with your hypervisor driver if you’re using a different one.(ex: docker, qemu etc)
Output:
└─$minikube start --driver=kvm
😄  minikube v1.31.2 on Ubuntu 22.04
    ▪ MINIKUBE_ACTIVE_DOCKERD=minikube
✨  Using the kvm2 driver based on user configuration
👍  Starting control plane node minikube in cluster minikube
🔥  Creating kvm2 VM (CPUs=2, Memory=3800MB, Disk=20000MB) ...
🐳  Preparing Kubernetes v1.27.4 on Docker 24.0.4 ...
    ▪ Generating certificates and keys ...
    ▪ Booting up control plane ...
    ▪ Configuring RBAC rules ...
🔗  Configuring bridge CNI (Container Networking Interface) ...
🔎  Verifying Kubernetes components...
    ▪ Using image gcr.io/k8s-minikube/storage-provisioner:v5
🌟  Enabled addons: storage-provisioner, default-storageclass
🏄  Done! kubectl is now configured to use "minikube" cluster and "default" namespace by default
iv) You can also use custom size for ram storage and cpu if needed using the command below,
minikube start --cpus=4 --memory=8192 --disk-size=40g --driver=kvm
Note: make sure your command does not exceed your system configuration.
v) Once the cluster is up and running, you can verify its status by running:
minikube status
Output:
└─$minikube status
minikube
type: Control Plane
host: Running
kubelet: Running
apiserver: Running
kubeconfig: Configured
Step 3: Interact with Your Minikube Cluster
To use kubectl with your Minikube cluster, you need to point it to the Minikube context. Run the following command:
kubectl config use-context minikube
Output:
└─$kubectl config use-context minikube
Switched to context "minikube".
You can now use kubectl to manage your Minikube cluster just like you would with any other Kubernetes cluster.
Step 4: Deploy Applications
Now that your Minikube cluster is set up, you can start deploying and testing applications. Use kubectl to create and manage deployments, services, and pods.
i) Create a Deployment using the following command,
kubectl create deployment my-app-deployment --image=nginx:latest
ii) Now expose your deployment with a service in order to access it by using the following command,
kubectl expose deployment my-app-deployment --type=NodePort --port=80
Note: The above “–-port=80” is the container port not the exposed port.
iii) Now enter the below command to find out the IP address of minikube,
minikube ip
Output:
└─$minikube ip
192.168.39.43
iv) In order to access your app, you have to find which port your app is exposed to. To find out enter the following command,
kubectl get svc
Output:

From the above output, you can see your deployment name (my-app-deployment) and its exposed port.
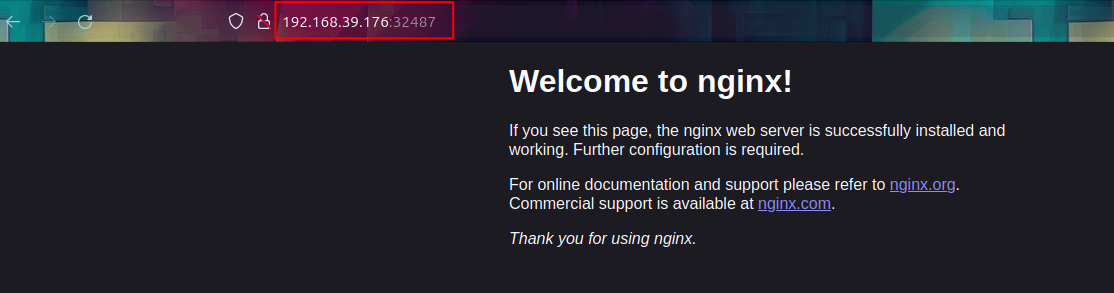
v) In your web browser, type the minikube ip value and your port number to access your application.
Step 5: Frequently used commands for kubectl
i) You can also scale your deployment to have multiple replicas,
kubectl scale --replicas=5 deployment/my-app-deployment
ii) To view the new replicas either watch pods or deployments,
kubectl get pods
Output:
└─$kubectl get pods
NAME                                READY   STATUS    RESTARTS   AGE
my-app-deployment-6d5f47bb4-9clll   1/1     Running   0          22s
my-app-deployment-6d5f47bb4-bctzv   1/1     Running   0          22s
my-app-deployment-6d5f47bb4-hcxht   1/1     Running   0          22s
my-app-deployment-6d5f47bb4-smx7g   1/1     Running   0          22s
my-app-deployment-6d5f47bb4-tb7fl   1/1     Running   0          4m8s
iii) To list services within the cluster node,
kubectl get services
<OR>
kubectl get svc
Output:
└─$kubectl get svc
NAME               TYPE        CLUSTER-IP       EXTERNAL-IP   PORT(S)        AGE
deployment-app     NodePort    10.110.59.48     <none>        80:30888/TCP   24m
deployment-app-1   NodePort    10.106.189.167   <none>        80:31189/TCP   6s
kubernetes         ClusterIP   10.96.0.1        <none>        443/TCP        148m
iv) To list deployments within the namespace,
kubectl get deployments
Output:
NAME               READY   UP-TO-DATE   AVAILABLE   AGE
deployment-app     1/1     1            1           41m
deployment-app-1   1/1     1            1           3m1s
deployment-app-2   1/1     1            1           53s
v) You can delete a service using the following command,
kubectl delete service <service-name>
Output:
└─$kubectl delete service my-app-deployment
service "my-app-deployment" deleted
vi) The same way you can also delete deployments,
kubectl delete deployment <deployment-name>
Output:
└─$kubectl delete deployment my-app-deployment
deployment.apps "my-app-deployment" deleted
Step 6 : Running Docker images in a minikube cluster
i) To run a local image built using docker, first you have to point minikube to use docker images using the following command,
eval $(minikube -p minikube docker-env)
Note: This command only lasts until the current terminal is open.
ii) Now build your docker image using a dockerfile or a docker compose file,
sudo docker build -t . image-name
iii) Now create another deployment using your docker image name also change the deployment name as needed,
kubectl create deployment deployment-app --image=<your-image-name>
Note: Make sure to enter sudo docker images command and check whether the image is present.
Output:
└─$kubectl create deployment deployment-app --image=web-server
deployment.apps/deployment-app created
iv) Now check the pods using kubectl get pods,
└─$kubectl get pods
NAME                              READY   STATUS         RESTARTS   AGE
deployment-app-585fbd8654-zm7dl   0/1     ErrImagePull   0          74s
The deployment has failed to run because minikube is searching for the image in a remote repository which, it does not exist.
v) In order to make minikube look for images in a local repository enter the following command,
kubectl edit deployment deployment-app
a file should have opened in the terminal similar to this,
# Please edit the object below. Lines beginning with a '#' will be ignored,
# and an empty file will abort the edit. If an error occurs while saving this file will be
# reopened with the relevant failures.
#
apiVersion: apps/v1
kind: Deployment
metadata:
  annotations:
    deployment.kubernetes.io/revision: "1"
  creationTimestamp: "2023-10-25T09:44:20Z"
  generation: 1
  labels:
    app: deployment-app
  name: deployment-app
  namespace: default
  resourceVersion: "3273"
  uid: c2198f0b-5dd5-4fde-9c3d-9b1242b33cdd
spec:
  progressDeadlineSeconds: 600
  replicas: 1
  revisionHistoryLimit: 10
  selector:
    matchLabels:
      app: deployment-app
  strategy:
    rollingUpdate:
      maxSurge: 25%
      maxUnavailable: 25%
    type: RollingUpdate
  template:
    metadata:
      creationTimestamp: null
      labels:
        app: deployment-app
      spec:
      containers:
      - image: web-server
        imagePullPolicy: Always
        name: web-server
        resources: {}
        terminationMessagePath: /dev/termination-log
        terminationMessagePolicy: File
      dnsPolicy: ClusterFirst
      restartPolicy: Always
      schedulerName: default-scheduler
      securityContext: {}
      terminationGracePeriodSeconds: 30
status:
  conditions:
  - lastTransitionTime: "2023-10-25T09:44:20Z"
    lastUpdateTime: "2023-10-25T09:44:20Z"
    message: Deployment does not have minimum availability.
    reason: MinimumReplicasUnavailable
    status: "False"
    type: Available
  - lastTransitionTime: "2023-10-25T09:44:20Z"
    lastUpdateTime: "2023-10-25T09:44:20Z"
    message: ReplicaSet "deployment-app-585fbd8654" is progressing.
    reason: ReplicaSetUpdated
    status: "True"
    type: Progressing
  observedGeneration: 1
  replicas: 1
  unavailableReplicas: 1
  updatedReplicas: 1
In the YAML file, modify the line “imagePullPolicy: Always” to “imagePullPolicy: Never” as indicated below. This change will prevent Minikube from automatically seeking the image in a remote repository.
      spec:
      containers:
      - image: web-server
        imagePullPolicy: Never
Save and exit.
vi) Now watch the pods again using kubectl get pods ,
└─$kubectl get pods
NAME                              READY   STATUS    RESTARTS   AGE
deployment-app-68d4dd75bc-m7kqx   1/1     Running   0          7s
To expose the service use the same commands as above,
kubectl expose deployment deployment-app --type=NodePort --port=80
Output:
└─$kubectl expose deployment deployment-app --type=NodePort --port=80
service/deployment-app exposed
Conclusion
Minikube provides an excellent way to explore Kubernetes in a local development environment without the need for complex infrastructure. By following the steps outlined in this guide and ensuring you have the necessary prerequisites, you can quickly set up and experiment with Kubernetes on your local machine.