Table of Contents
- Introduction
- Prerequisites
- Downloading and Starting Apache JMeter
- Creating Your First JMeter Test Plan
- Running a Test with JMeter
- Analyzing and Interpreting Test Results
- Conclusion
Introduction
Apache JMeter is a powerful open-source tool for load testing and performance measurement. This guide will walk you through the step-by-step process of installing and configuring Apache JMeter on Ubuntu 22.04, so you can start testing your applications efficiently. Before we dive into the installation, let’s go over the prerequisites and what you can expect from this guide.
Prerequisites
Before you dive into the installation process, make sure you have these essential prerequisites ready:
Java Development Kit (JDK): Apache JMeter requires Java to run. Make sure you have JDK 8 or later installed on your system.
Downloading and Starting Apache JMeter
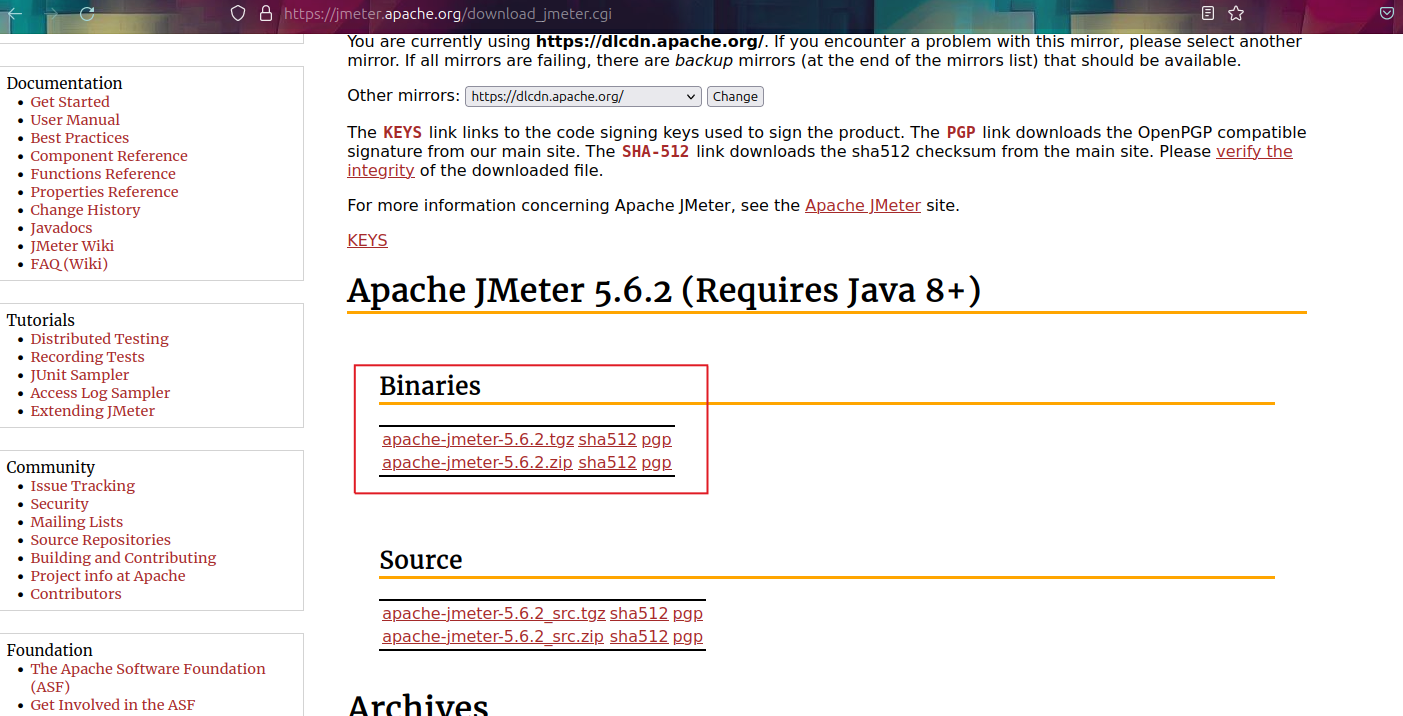
Download the latest version of Apache JMeter from the official website by referring to this link.
https://jmeter.apache.org/download_jmeter.cgi
Download the binary package
- Extract the package, open a terminal in that folder, and navigate to the ‘bin’ directory.
- Start the JMeter application by executing the following command:
java -jar ApacheJmeter.jar
The JMeter application will launch.
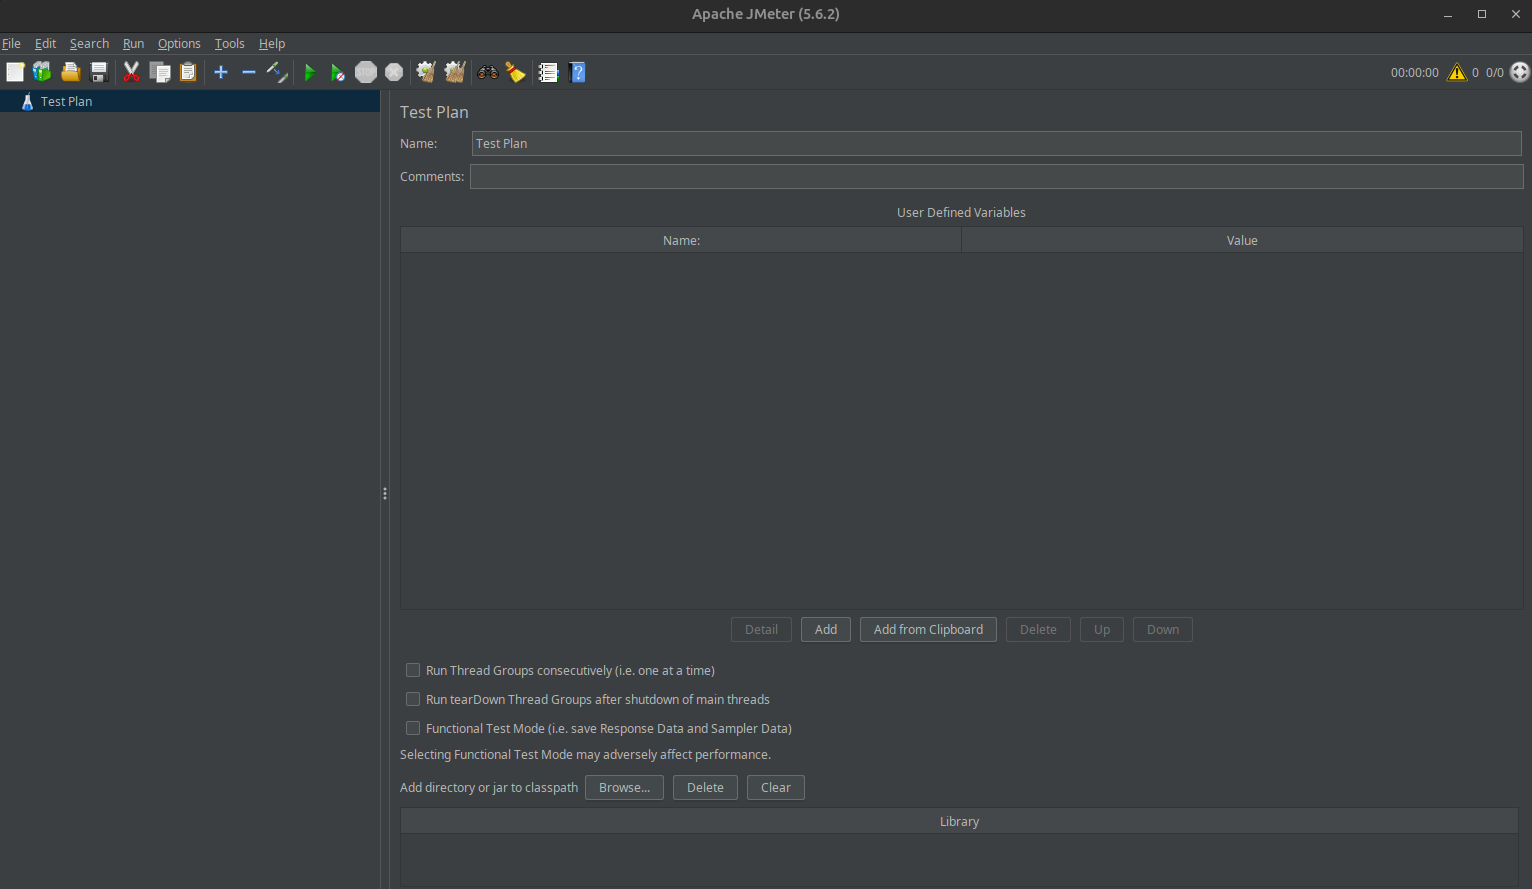
Creating Your First JMeter Test Plan
In Apache JMeter, a test plan comprises crucial elements such as thread groups, request samplers, controllers, listeners, configuration elements, and assertions. These components define the structure, behavior, and data collection of performance tests, enabling detailed testing scenarios for web applications and services.
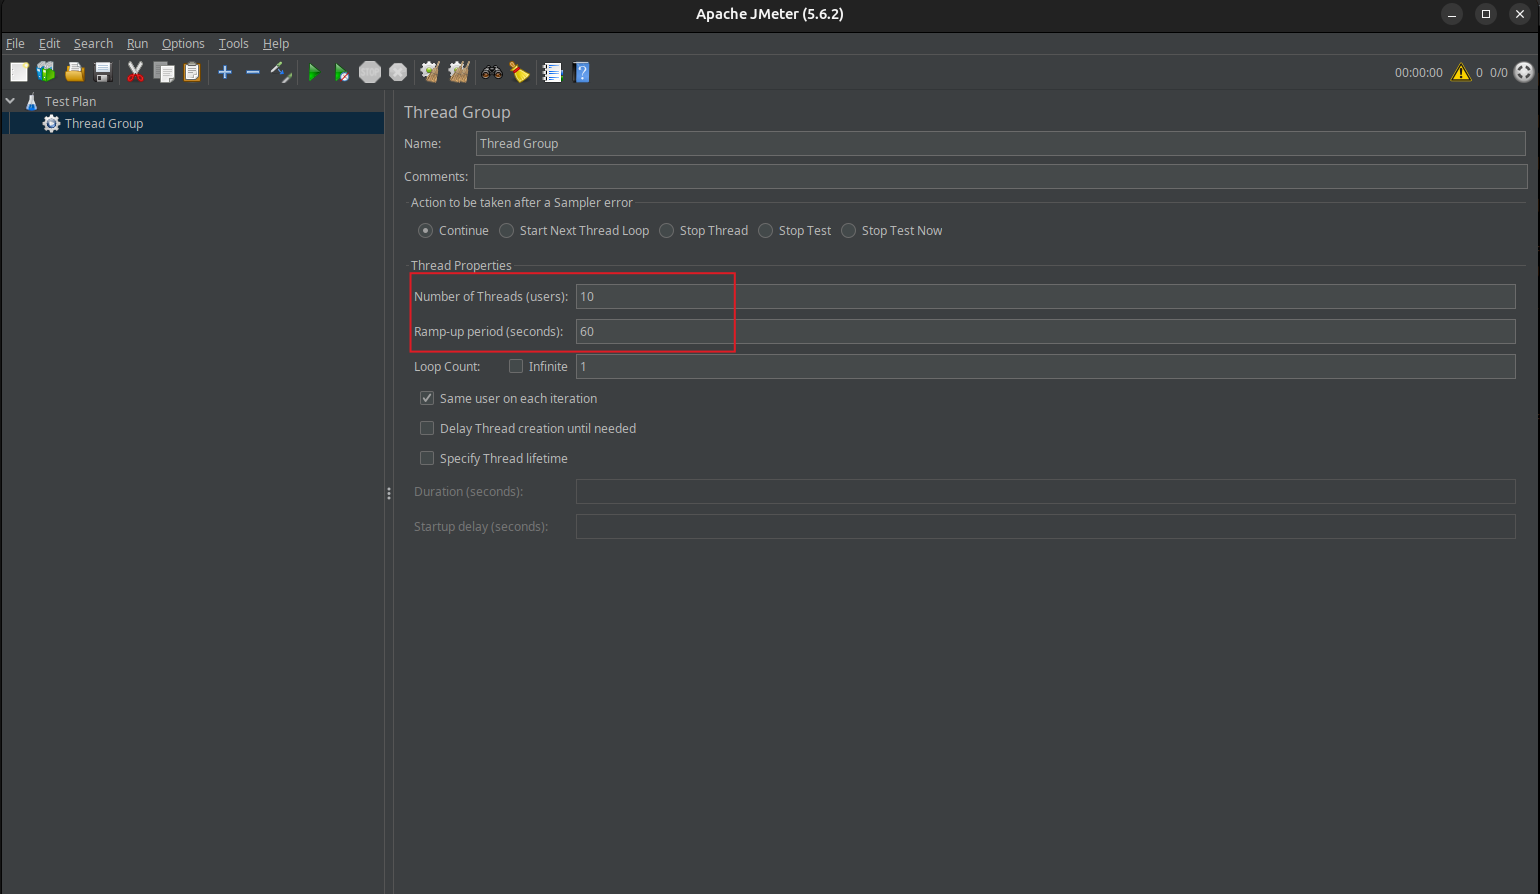
Now, let’s test the Node.js application to determine its ability to handle multiple logins from 10 users over a 60-second time frame.
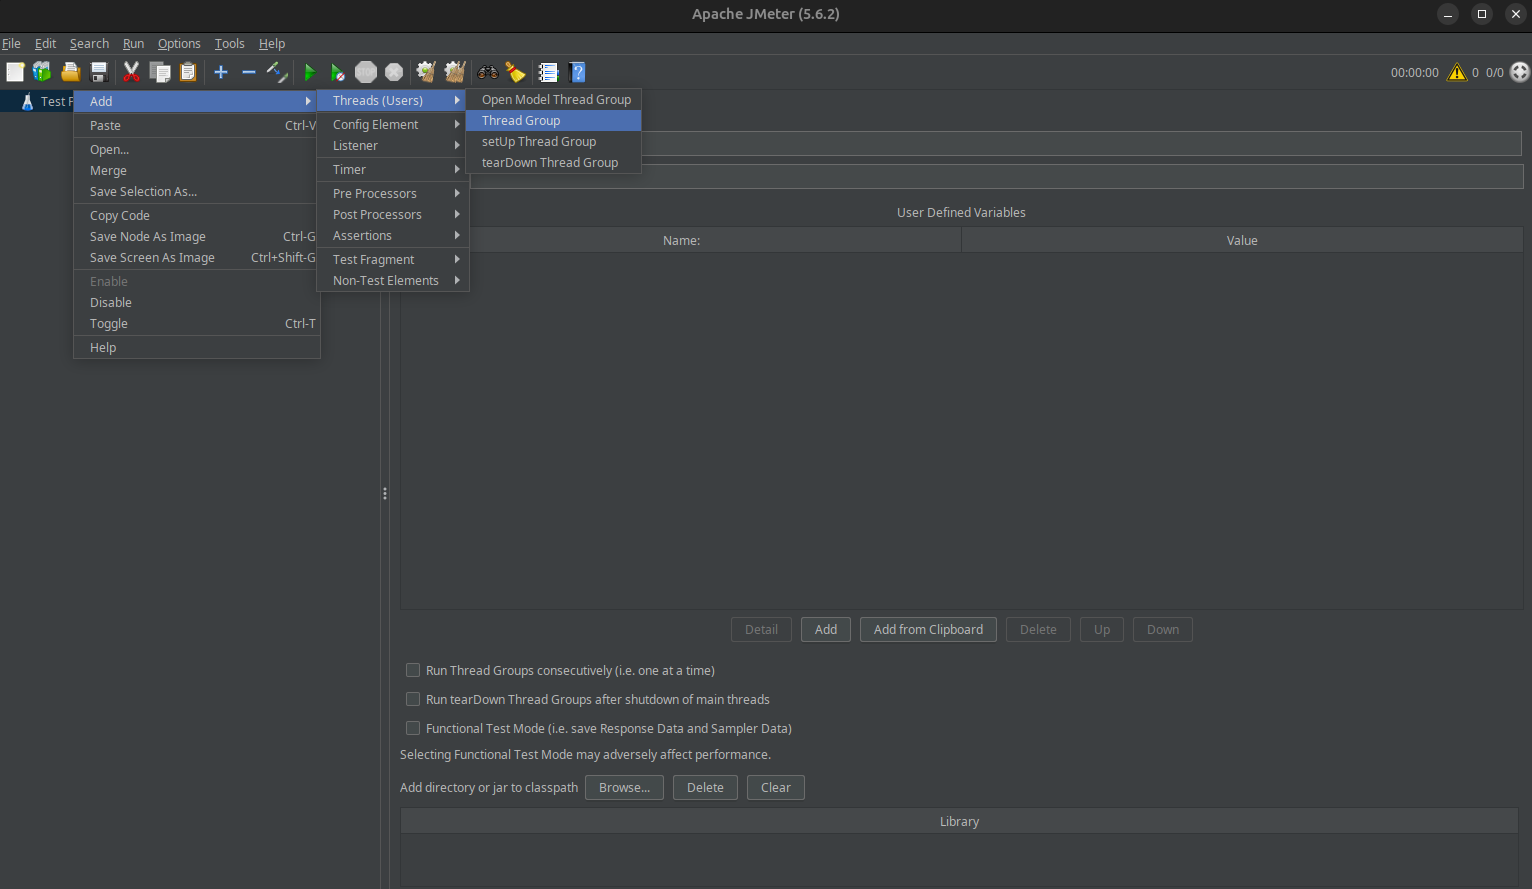
A Thread group is an essential element within a test plan that represents a group of virtual users or threads. It defines the number of concurrent users or threads that will be used to execute the test.
Create a thread group: Right click on Test Plan then select “Add” > Threads”(Users)” > “Thread Group”.
Under thread properties, Enter the value Number of Threads 10 and Ramp-up period 60 seconds ,
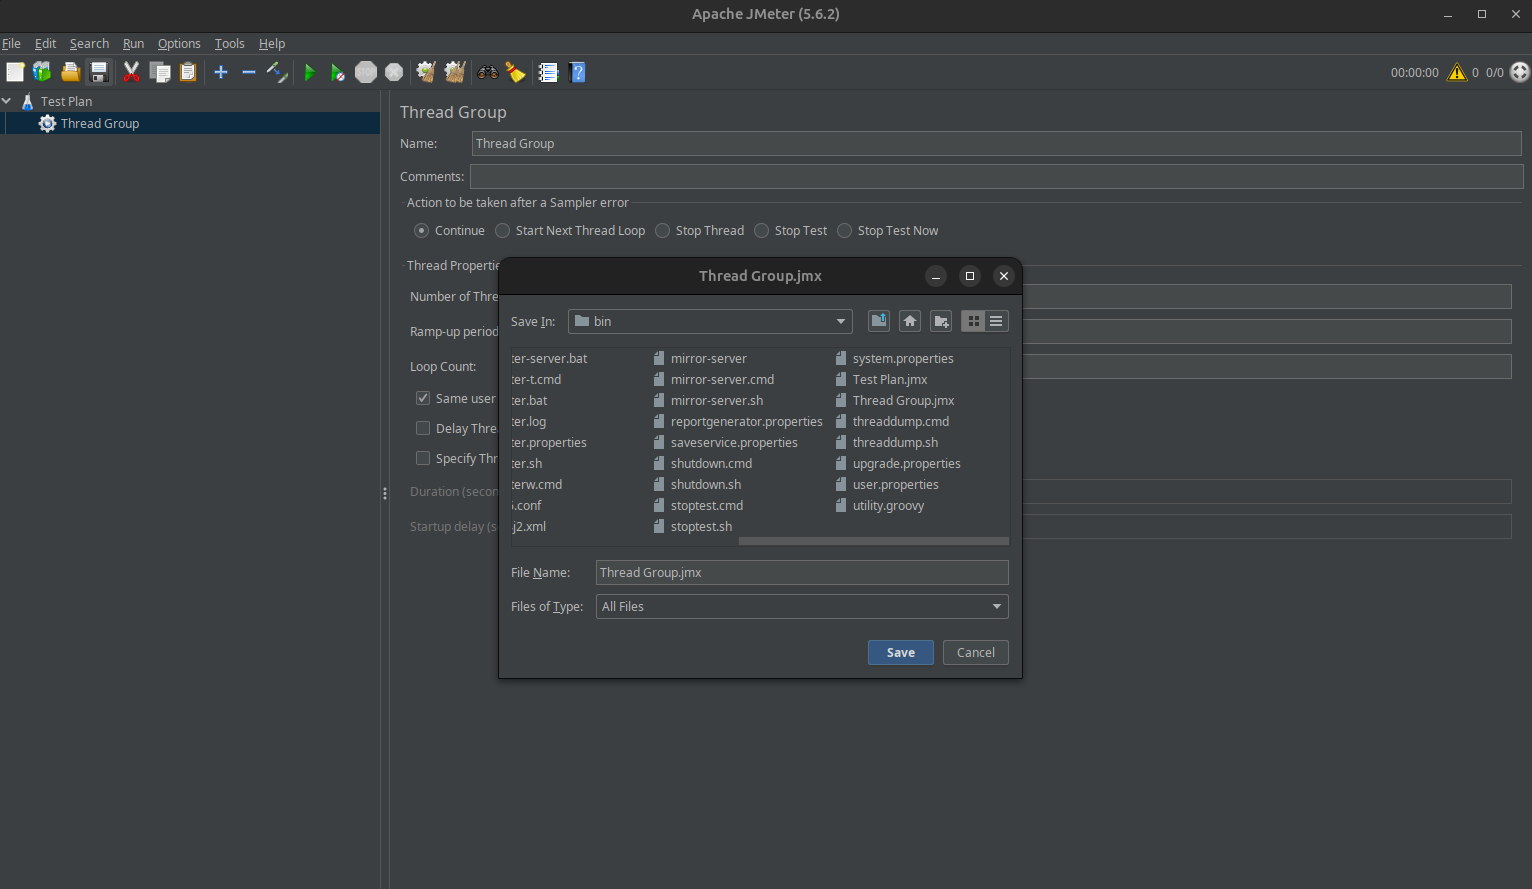
Click the save icon at the menu bar and select a location where you want to save
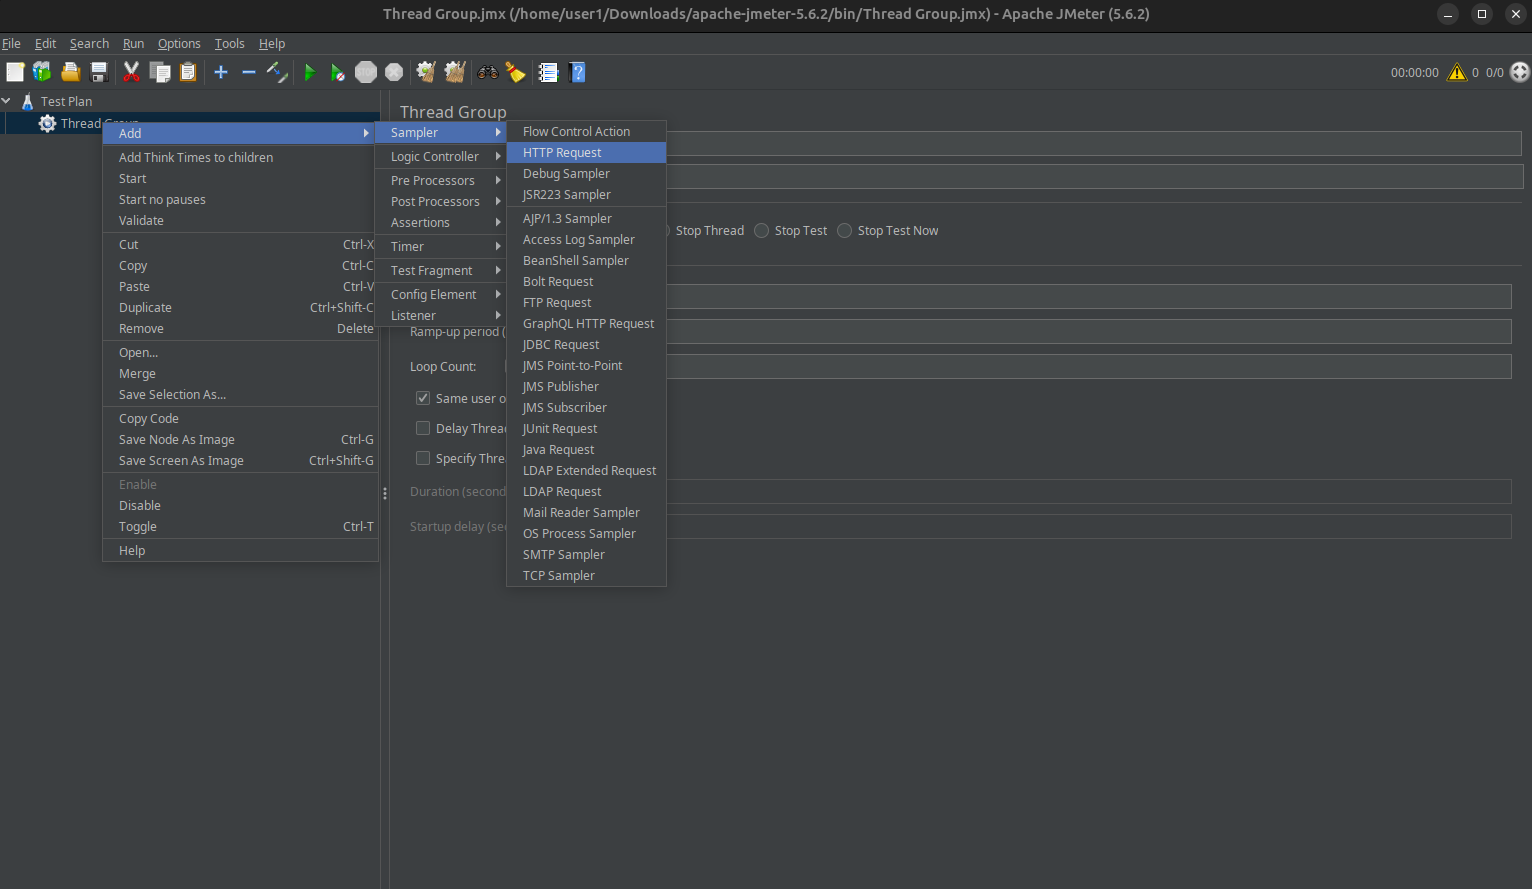
An HTTP Request in JMeter is a sampler element used to simulate an HTTP request to a web server. It is created to send HTTP GET or POST requests to a target URL, including parameters, headers, and optionally a request body.
Create a HTTP Request: right-click on the Thread Group, then select “Add” > “Sampler” > “HTTP Request.”
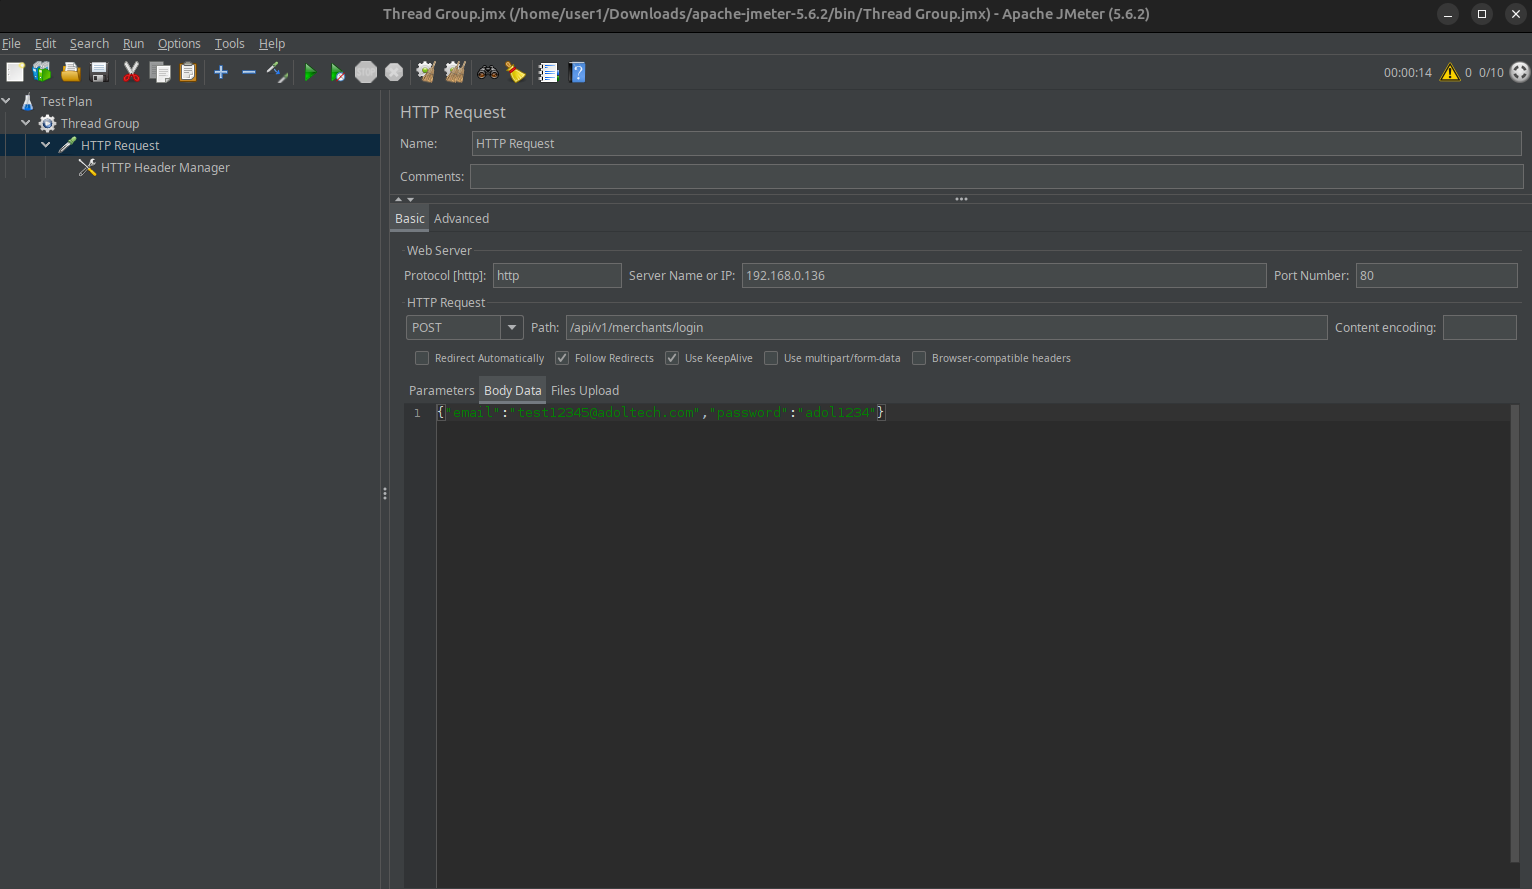
Fill in the specific values for the URL, port number, HTTP protocol, body data, and path as required.
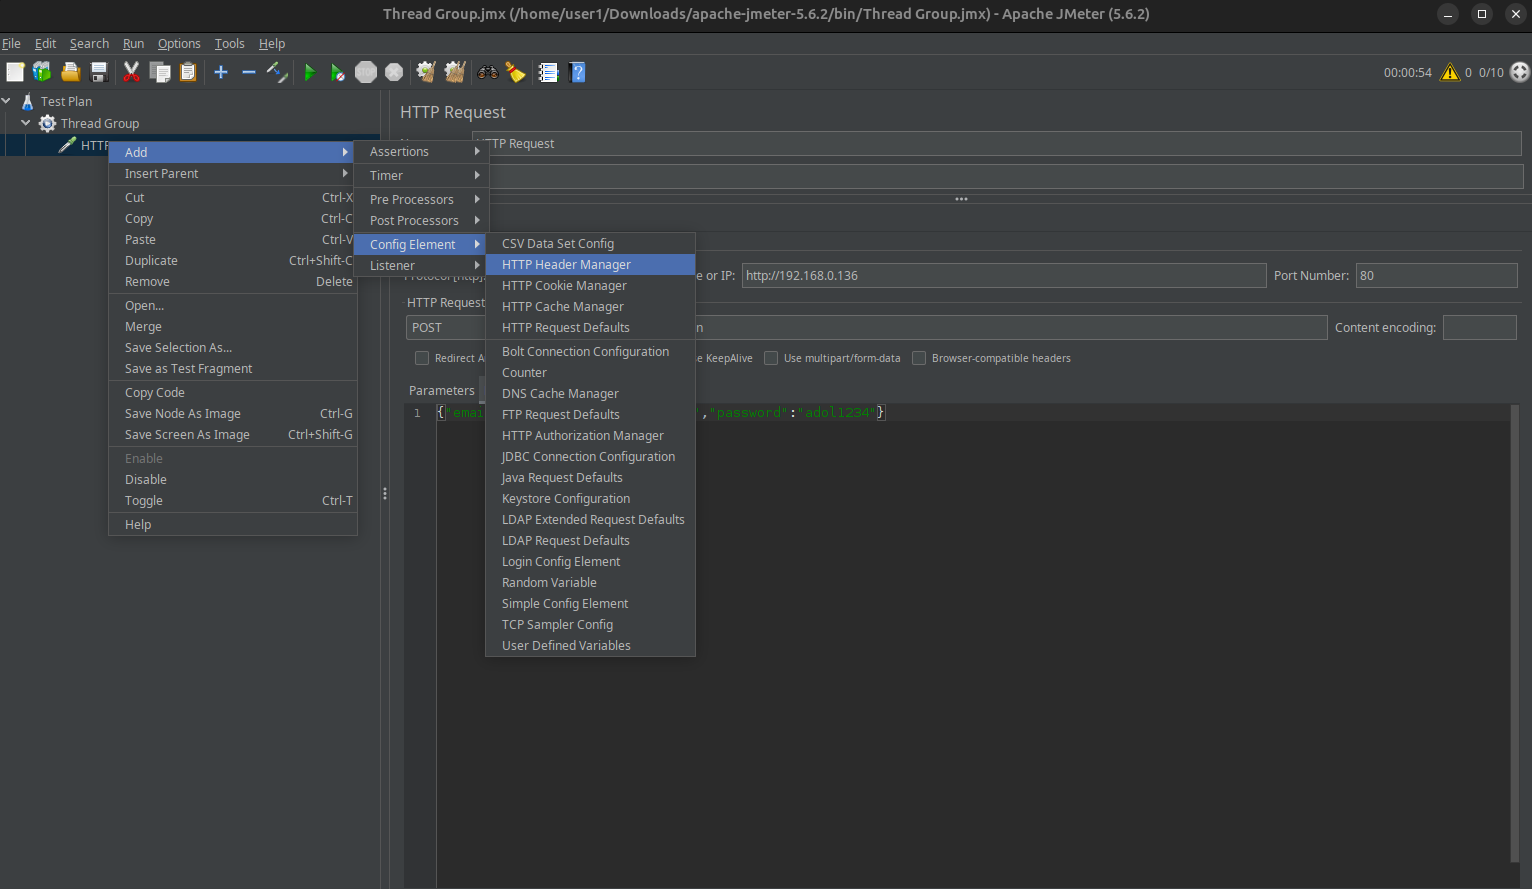
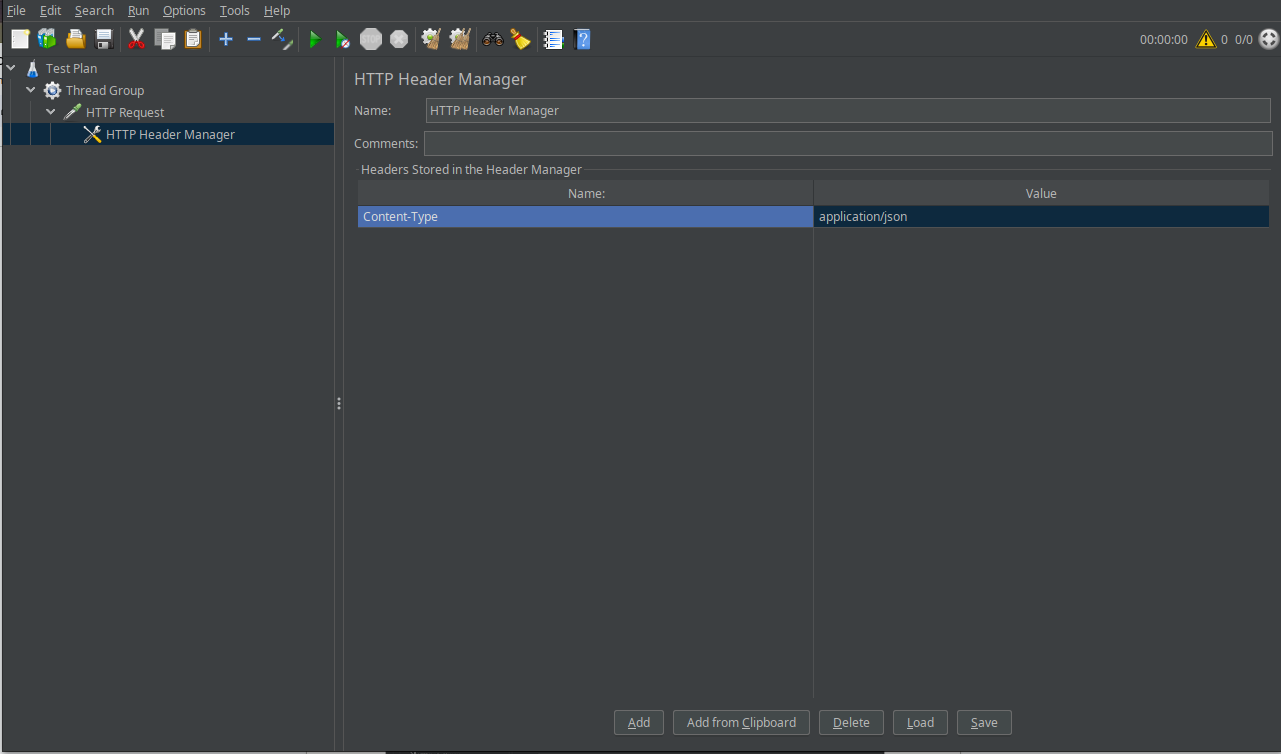
A HTTP Header Manager is a configuration element used to add or modify HTTP request headers for HTTP requests sent to a web server. It allows you to customize and control the headers that are included in your HTTP requests. HTTP headers are essential for sending additional information along with the request, such as user-agent information, authentication credentials, content type, and more.
Create a HTTP Header Manager: right-click on the HTTP Request, then select “Add” > “Config Element” > “HTTP Header Manager.”
In this step, add any necessary HTTP headers for sending the body data. In this case, a required HTTP header is “Content-Type” with a value of “application/json.” Don’t forget to save your settings.
Running a Test with JMeter
Click the “Start” button on the menu bar to initiate the test.

Analyzing and Interpreting Test Results
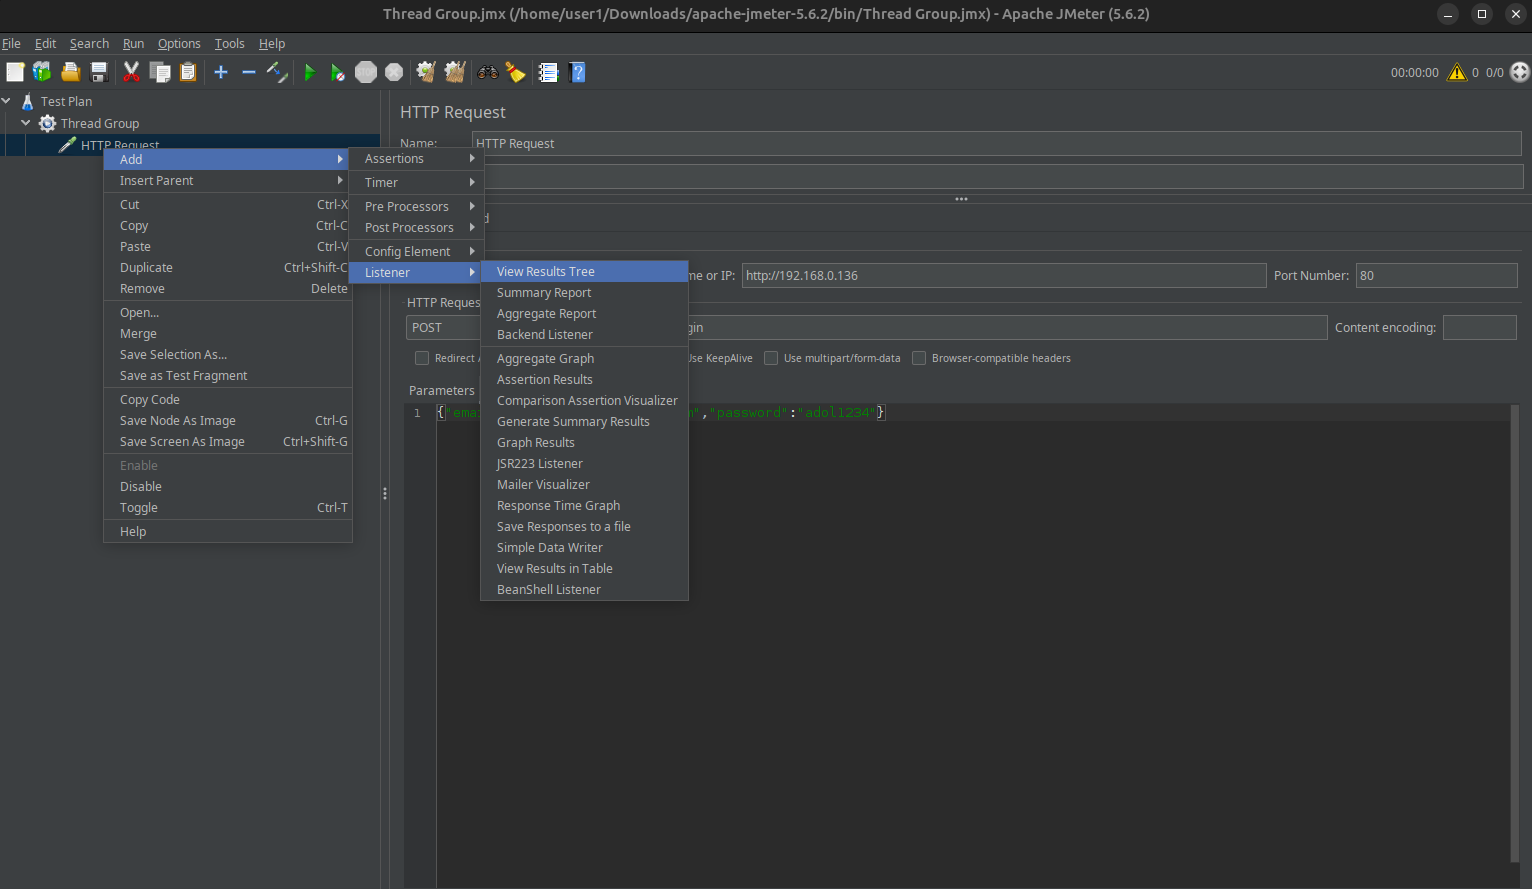
Listeners in JMeter are crucial for monitoring, analyzing, and reporting the results of your performance tests. They help you understand how your application or service behaves under various load conditions and facilitate the identification and resolution of performance issues.
Create a listener: right-click on the HTTP Request in the left-side pane and select “Add” > “Listener” > “View Results Tree.”
A new pane named “View Results Tree” will be created, which is used to display test results.
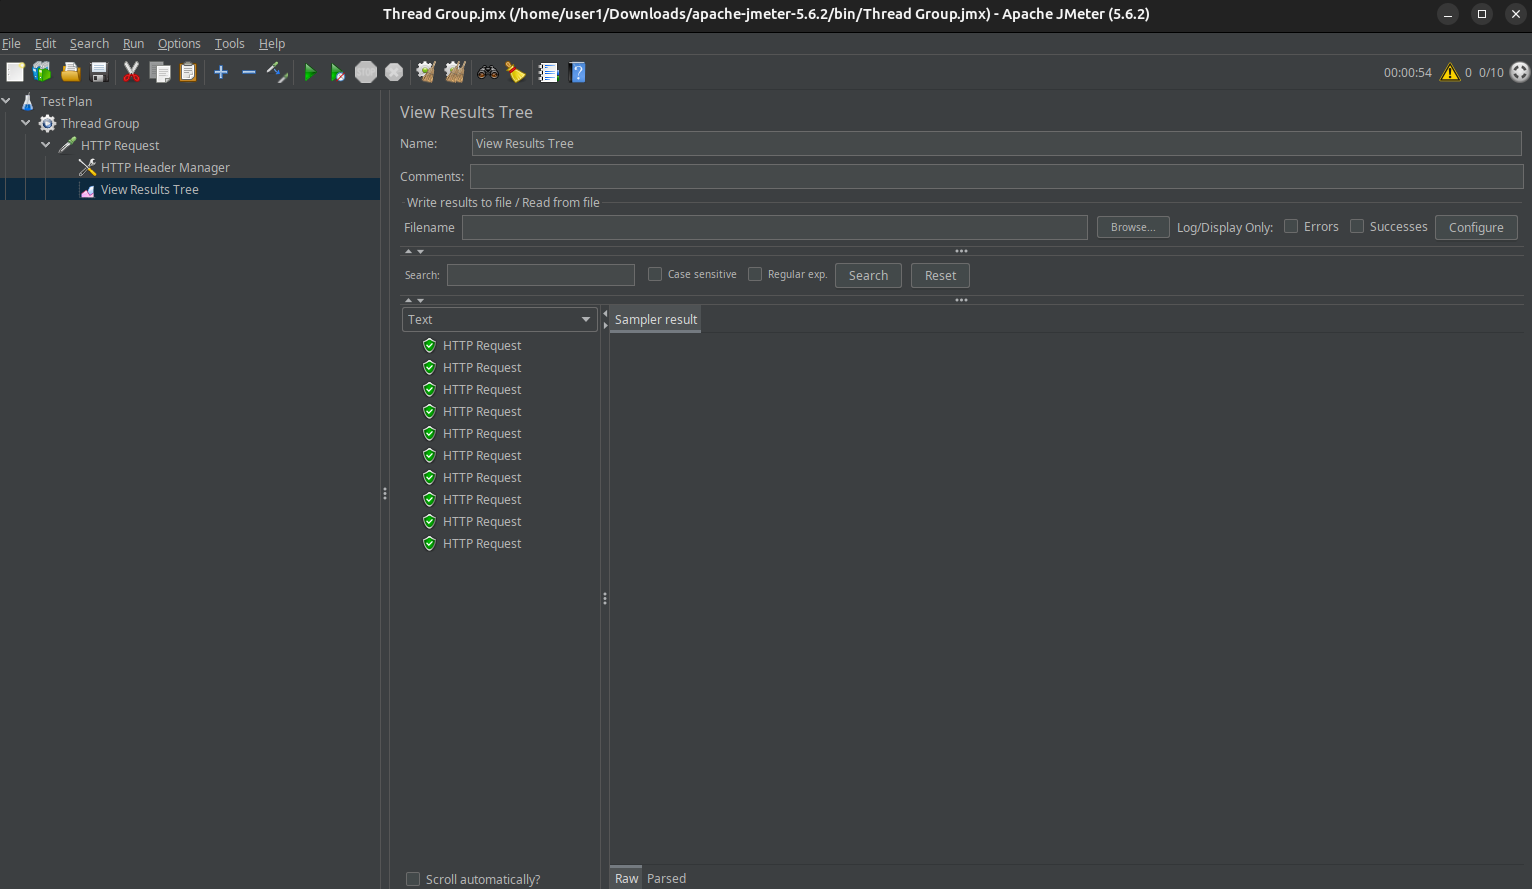
Given that all the requests have completed without errors, it indicates that the server can effectively handle the provided threads.
You can also explore different scenarios by experimenting with a higher number of threads or adjusting the ramp-up period according to your specific testing requirements.
Conclusion
In conclusion, with the step-by-step guidance provided in this tutorial, you’ve successfully installed and configured Apache JMeter on your Ubuntu 22.04 system. Armed with this powerful tool, you’re now equipped to conduct thorough load tests and performance evaluations for your applications, ensuring they deliver a seamless and reliable experience to your users. Whether you’re fine-tuning existing software or testing new developments, Apache JMeter on Ubuntu 22.04 is your gateway to optimizing application performance. Happy testing!