Reading Time: 2 mins.
Overview:
The Jenkins “Freestyle” job enables you to build sequential tasks in the application lifecycle. Yet at the same time, there are some post-build actions that are limited in its nature. With the help of plugins, you can easily overthrow these restrictions and extend the Jenkins functionality so as to use its benefits to the fullest. The previous article, All about Jenkins Installation Process on Ubuntu 18.04 , provided you with a basic intro about Jenkins software, and the steps involved in the installation process of the same on Ubuntu system. As a follow up, here in this article, we are going to create the basic Freestyle Project, (one of the flexible and easy projects to be built) in Jenkins.
Let’s Start Building the Jenkins’ Job:
Step: 1
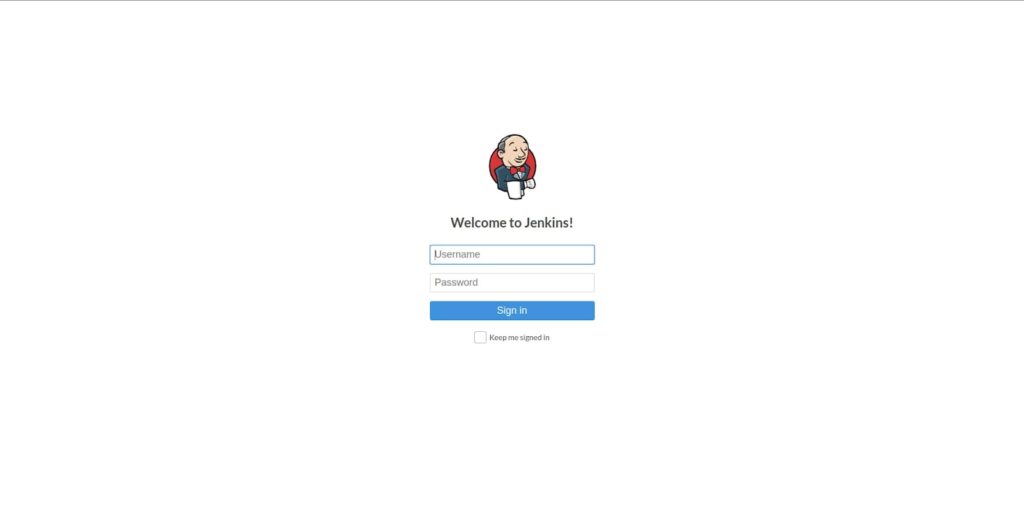
Login to your Jenkins dashboard using the Jenkins installation path. If not you have installed Jenkins on other location, the usual hosted location of it is on localhost at http://localhost:8080
Step: 2
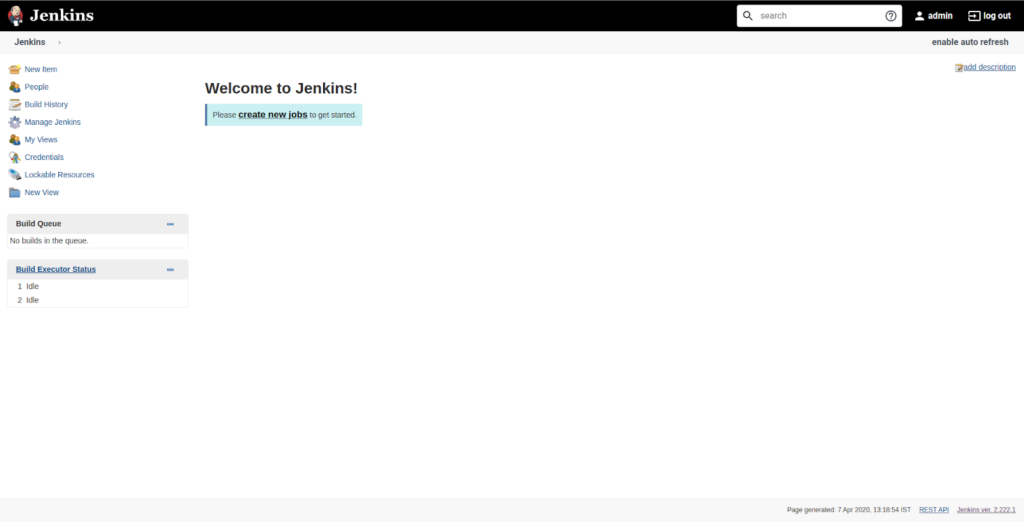
To create your project, find and select New Item present at the top left side of your Jenkins dashboard.
Next, enter the item name for the project you wish to build. For a demonstration purpose, “Demo” is used.
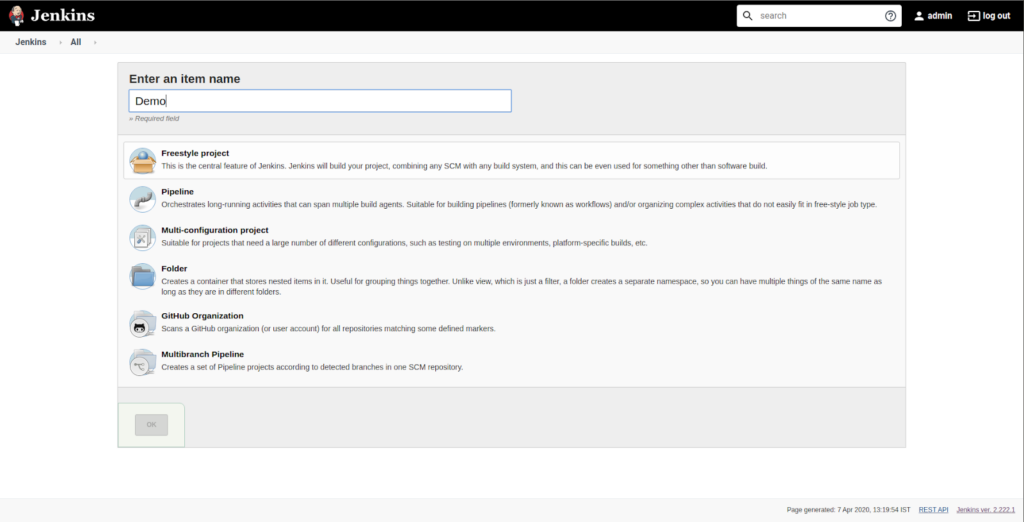
Upon completion, click OK.
Step: 3
Under the General tab, provide a description for your newly created project.
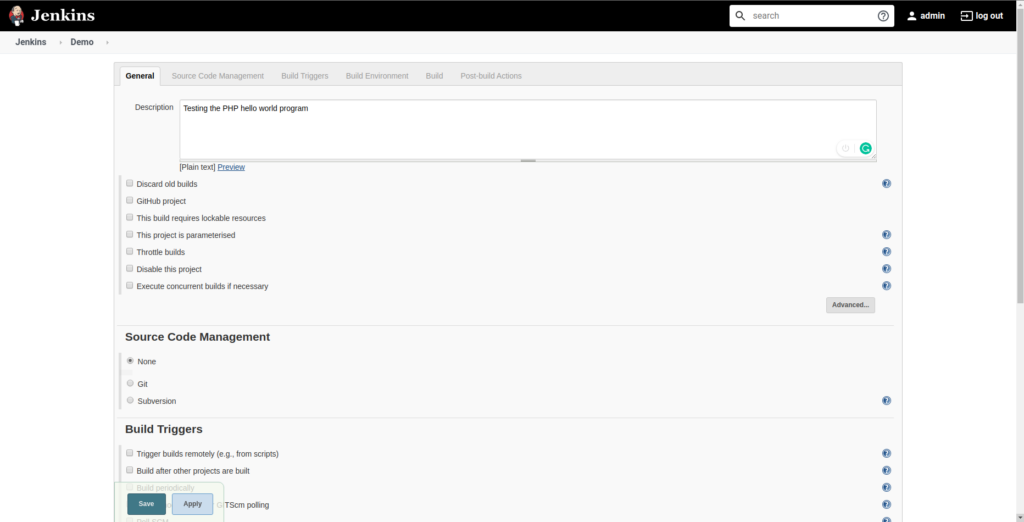
Similarly, under the Source Code Management, enter the repository url. In case, if it is a git repository, select the check-box, Git and if it belongs to other repositories, select Other. For example, a git repository, github.com/drnic/php-helloworld is used.
Note: At the time of using a private git repository, the source code will be pulled out from the repository only after Jenkins validates the login credentials.

You can schedule the job building as per your preferences by setting fixed times in the Settings section. Post the configuration, it’s time to start building the job.
Step: 4
Go to Add Build Step and select Execute shell, wherein include the commands that you wish to execute during the build process.
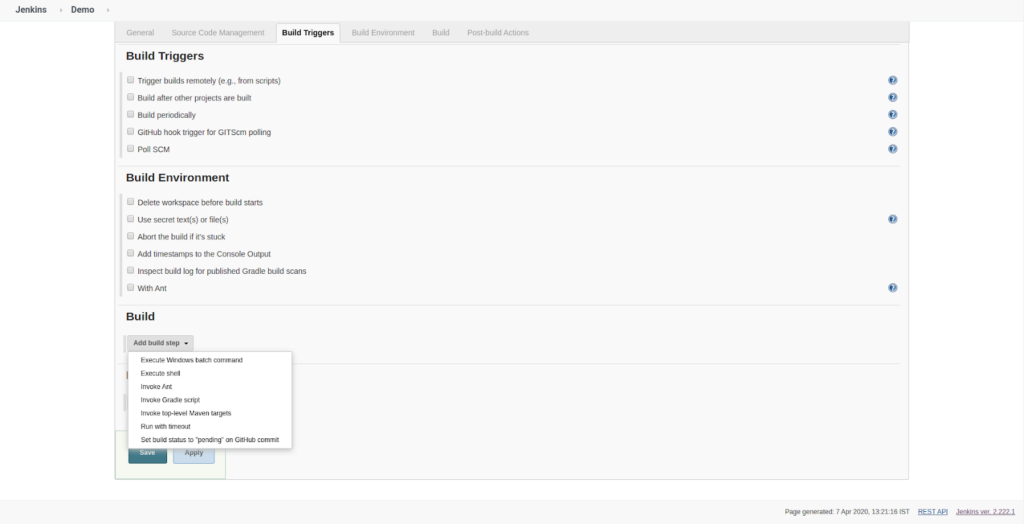
For example, here we have the hello world php code that is added in the execute shell.
In the below screenshot, you can see the echo of the php hello world code from git repository.
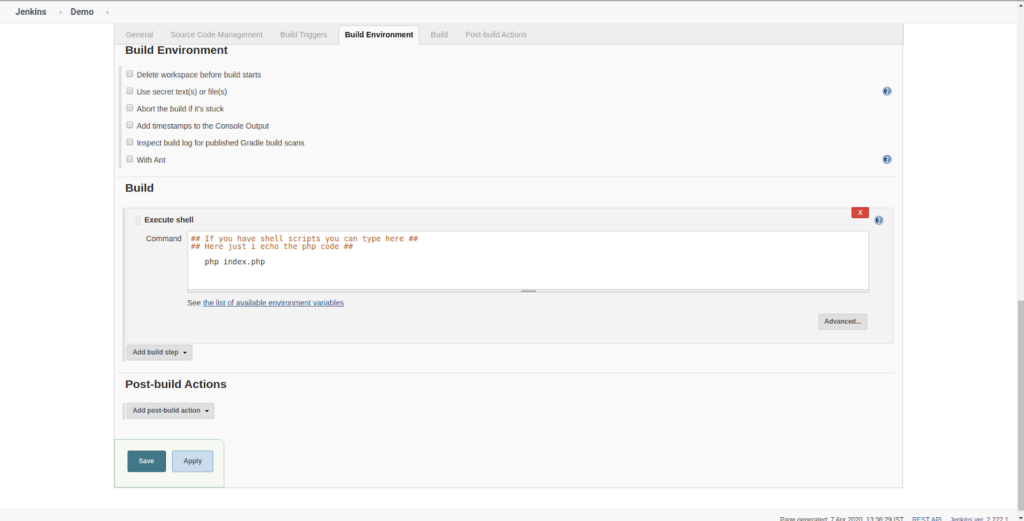
Upon completion, click and Apply and Save the project.
Step: 5
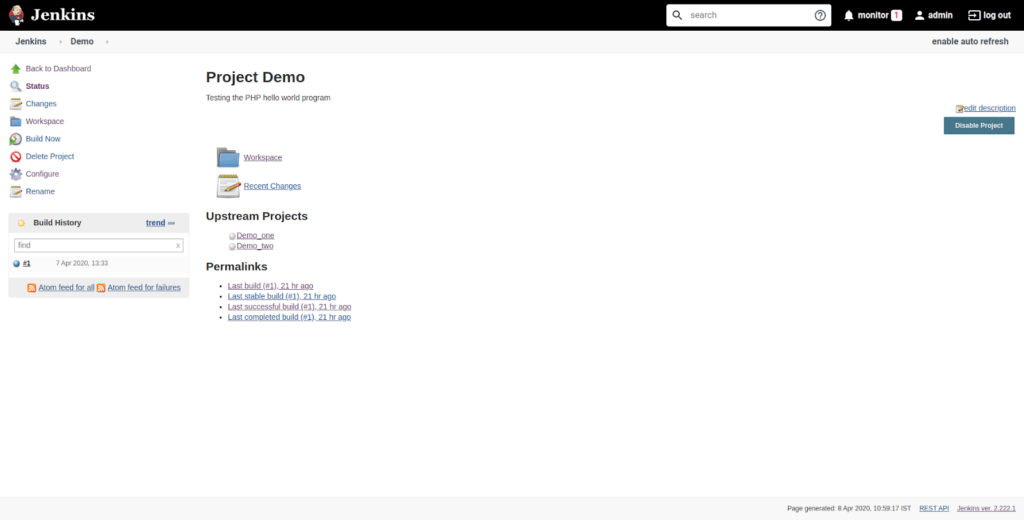
Next, find and select Click the Build Now to build the code.
Step: 6
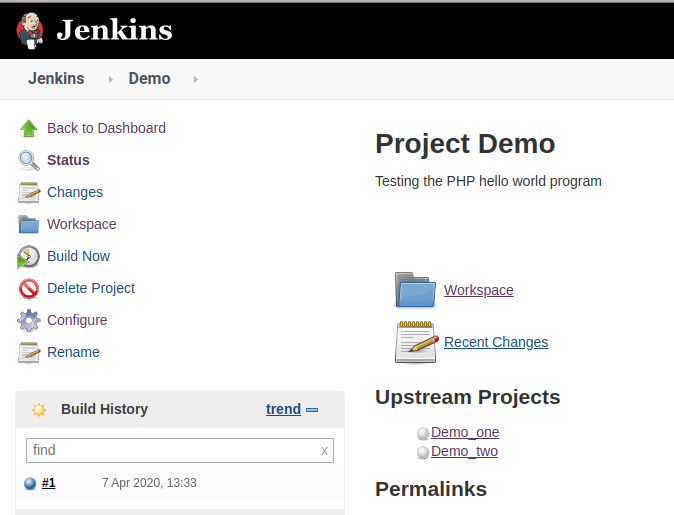
You can track the status of the build in Build History as shown in the screenshot below.
Step: 7
To view your complete build status, select the build number (for which you wish to view the status) and select Console Output which in turn fetches you with the confirmation message.
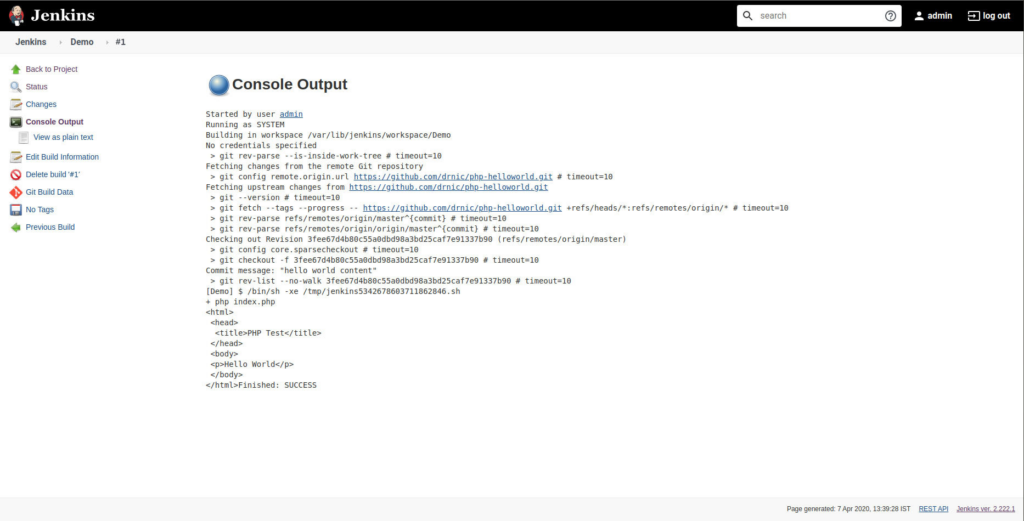
Thus, Jenkins successfully pulls the source code from the provided Github repository and continuously performs the build at the defined frequency and thereby, the execution of the Demo project has been successfully done.
Conclusion:
To take a glimpse, in this article, you had come across building a job from the scratch using a most trusted, and open-source automation server, Jenkins. As mentioned earlier, in Jenkins, you will be building a “freestyle” job for a series of tasks, but its post-build functionalities are limited to a certain extent. To get rid of these limitations, and to get the best out of Jenkins, kindly visit the continuation of this article, How to Build and Create a Pipeline Using Jenkins , which deals with the post-build actions (building a pipeline in Jenkins) with the help of plugins.