Installing Magento
Installing the Magento wizard constitutes of five phases:
- Readiness check
- Add a database
- Web configuration
- Customise your store
- Create admin account
- Install
Let’s now start proceeding with the above-mentioned steps to complete installing Magento.
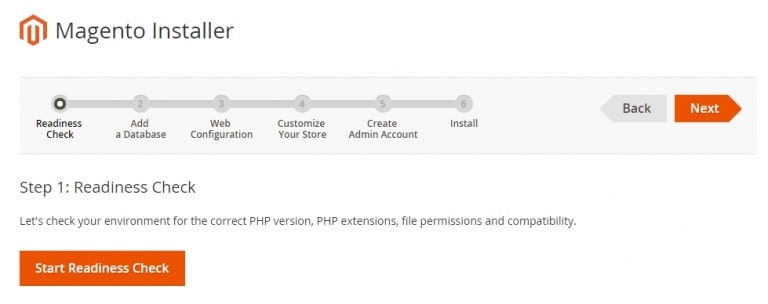
1: Readiness Check
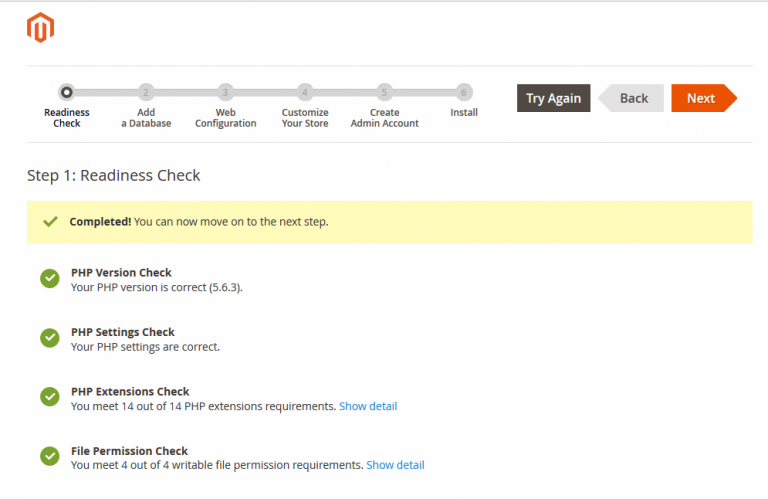
Make sure that you verify the existence of all the necessary PHP extensions. In case of failure, go ahead with clearing all the readiness check issues. To know about the missing/required PHP extensions, read our blog post, Installing PHP On Ubuntu 18.04
Click ‘Next’.
Step 2: Add a database
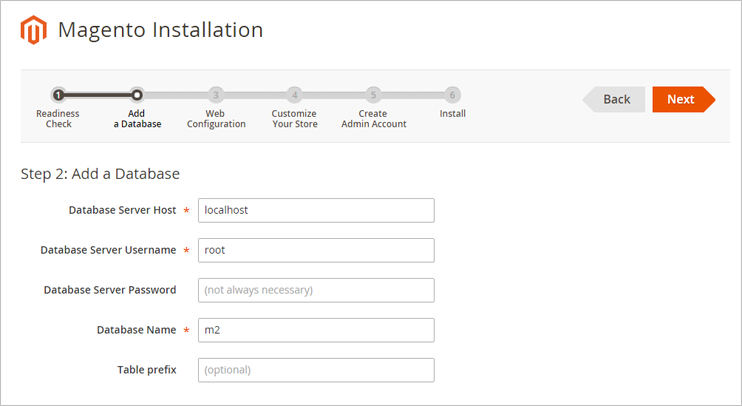
Fill in all the necessary information (the credentials which you have been created already), only then the process proceeds further. You can ignore the optional elements.
Note: Not yet created the database credentials? To know how to create above MySQL credentials, kindly follow the link, Installing MySQL On Ubuntu 18.04
Click ‘Next’.
Step 3: Web Configuration
The information provided will help you to optimize the Magento store for websites and users. Configure your store by entering the store address, Magento admin address and selecting other options.
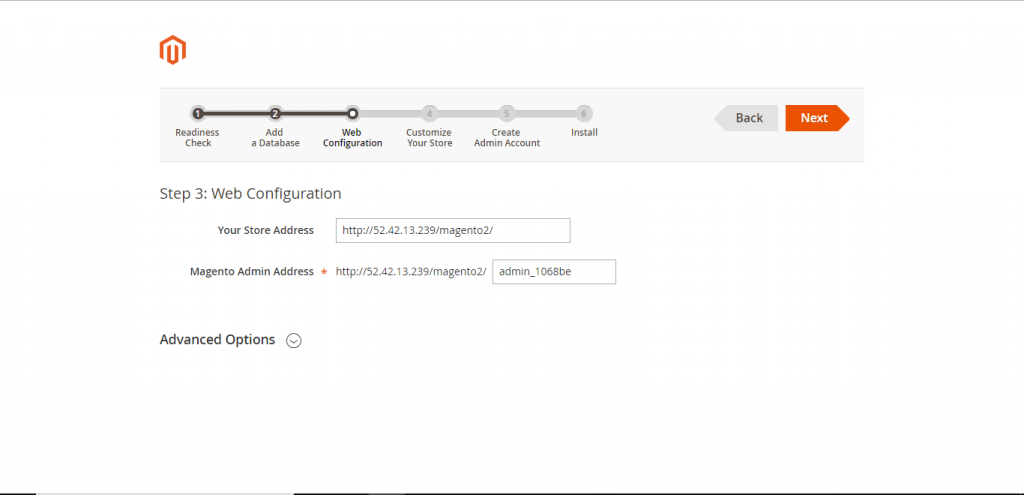
Either make a note of the default Magento admin (backend) URL or create your own backend URL as per your choice.
Click ‘Next’.
Step 4: Customize Your Store
In this phase, you will configure the settings such as local time zone, default currency and default language.
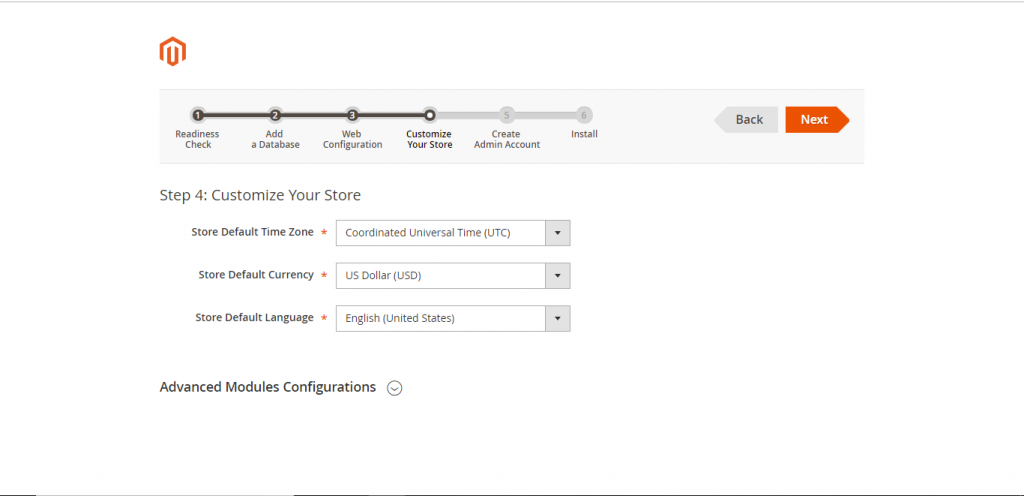
Click ‘Next’.
Step 5: Create Admin Account
Here, you will create a special username and password which will be used to manage your Magento store.
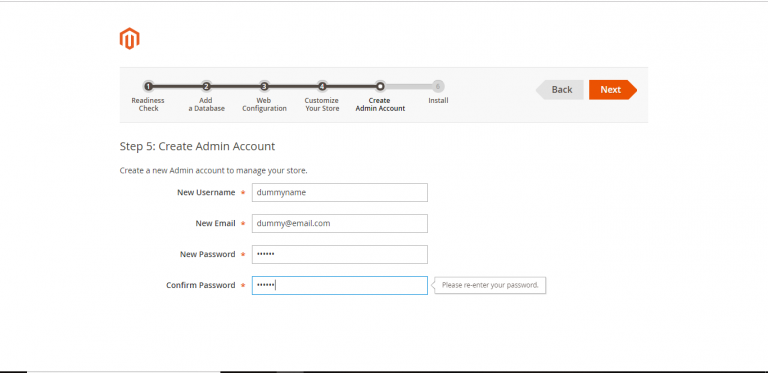
Click ‘Next’.
Step 6: Install
To install, click on the ‘Install Now’ button.

Upon successful installation, you will get the below-shown image.
Note: Make sure to note down all the credentials created for the admin account to manage the store.
Hurray! Get going with your new Magento store.
