Reading Time: 3 mins
Taking Screenshots for Failed Test Cases Using Selenium
In the below steps, let us see how to take screenshots for the failed test cases using Selenium WebDriver soon after analyzing the Output.
Step 1: Replace the webdriver object to TakesScreenshot
TakesScreenshot scrShot = ((TakesScreenshot)driver)
Step 2: Call getScreenshotAs to create a file (image)
File SrcFile = getScreenshotAs (OutputType.FILE)
Step 3: Copy file to the required location
FileUtils.copyFile(scrFile, new File("D:\\screenshot.jpg"))
Now, let us get going with how-to of installing Jenkins and configuring it to run with Selenium.
Integrating GitHub with Selenium
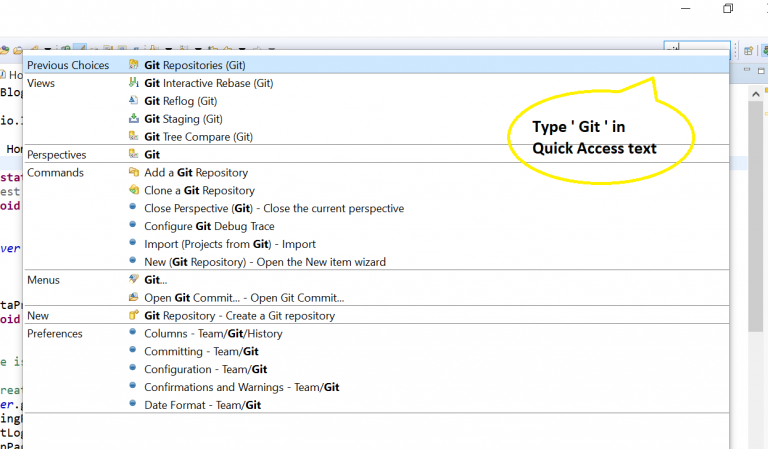
Open Selenium and navigate to the Quick Access TextBox and type ‘Git Repositories’.
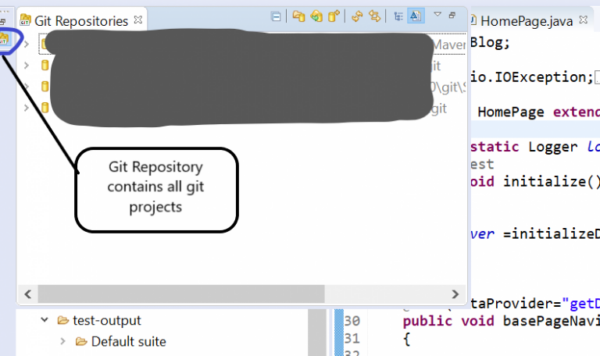
Post which you’ll be directed to the Git Repository page, wherein you can find all the projects you pushed to GitHub.
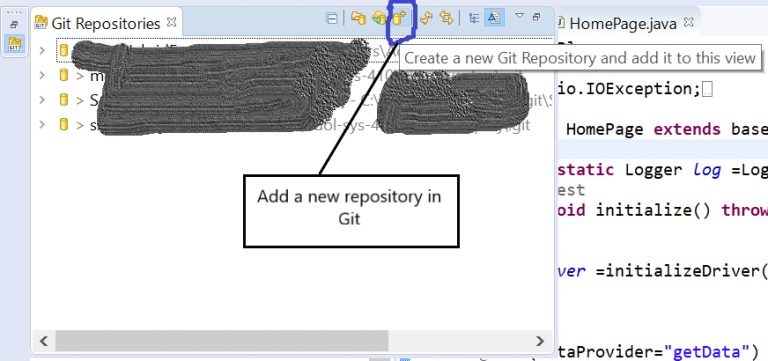
To add a new repository in Git, click on create new Git Repository icon as shown in the below image.
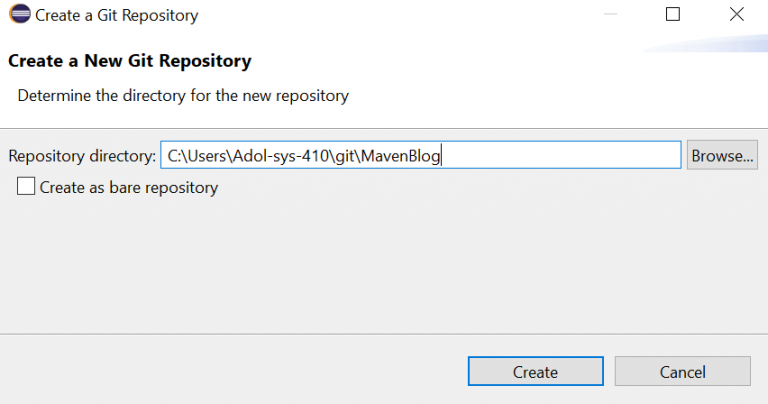
Now, enter the name of your project in the Repository Directory tab.
Upon completion, tap Create.
On Eclipse, go to the Project and right-click on the Properties to select Team.
Then, click Share Project.
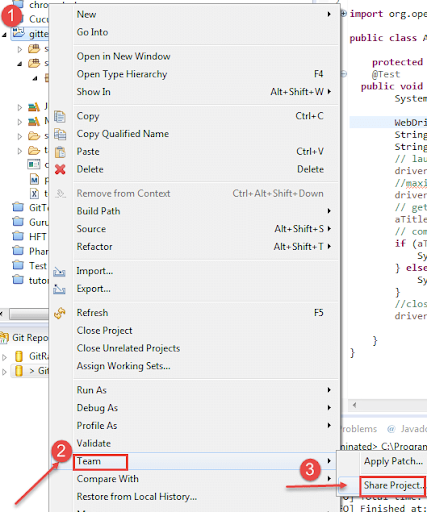
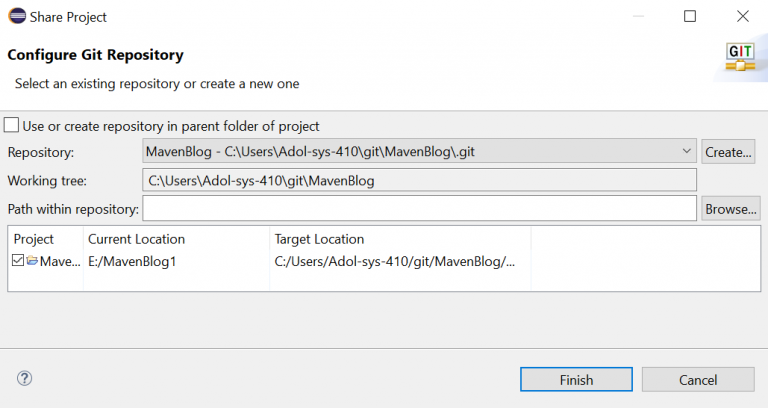
Post which you’ll be directed to Configure Git Repository page, wherein select the local repository and tap Finish.
Pushing the Code to GitHub
Again right-click on the Project and then on Team, to select Commit.
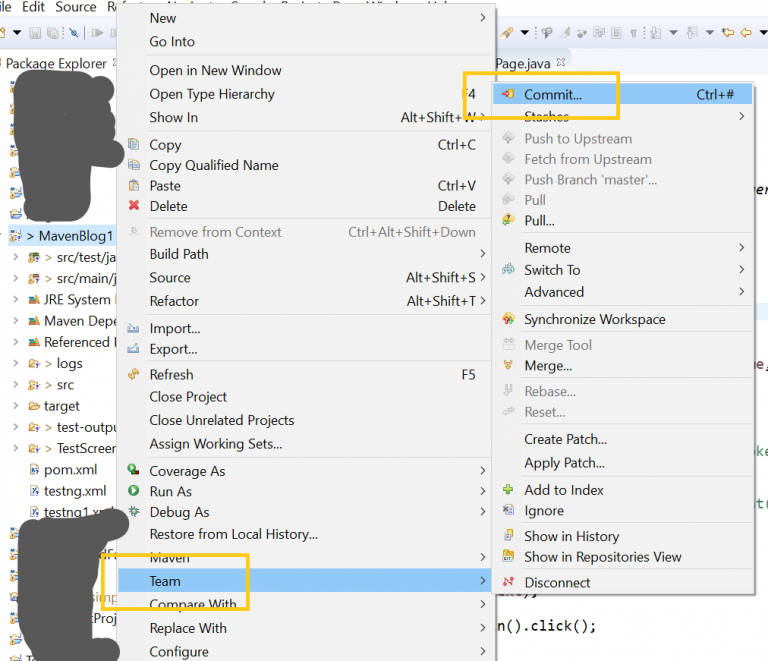
Now enter the commit message and choose the files which you want to send to the GitHub repository.

Upon completion, tap Commit and Push.
Post which, you’ll see your project icons in the folder like below.
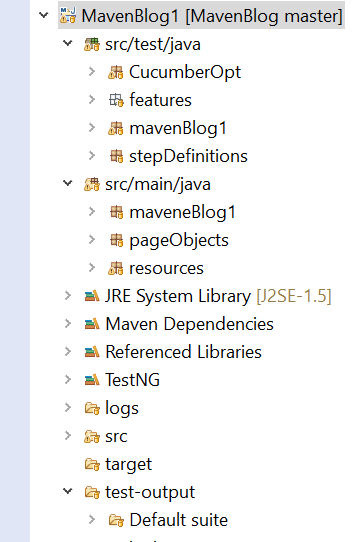
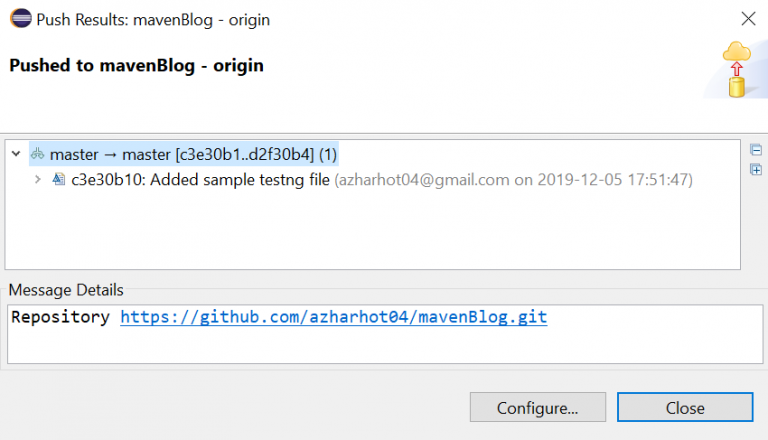
Now, check whether the project in the Git repository (under Branch Manager) and the uploaded file is of the same branch.
One other way to verify the successful action of committing and pushing the code can be seen in the GitHub’s repository.
Installing Jenkins and Configuring with Selenium
Step 1: Installing Jenkins
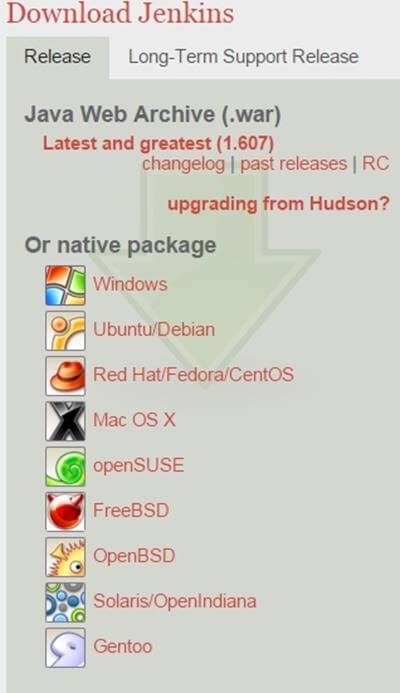
Visit the Jenkins official website http://jenkins-ci.org/ and choose the package to download according to your OS setup.
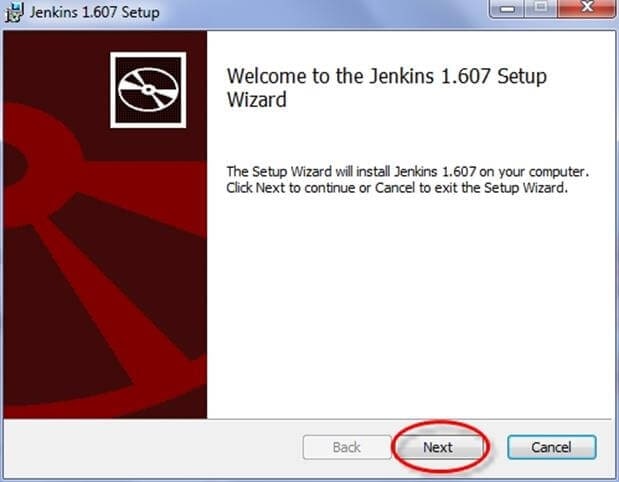
Start running the exe file after unzipping Jenkins.
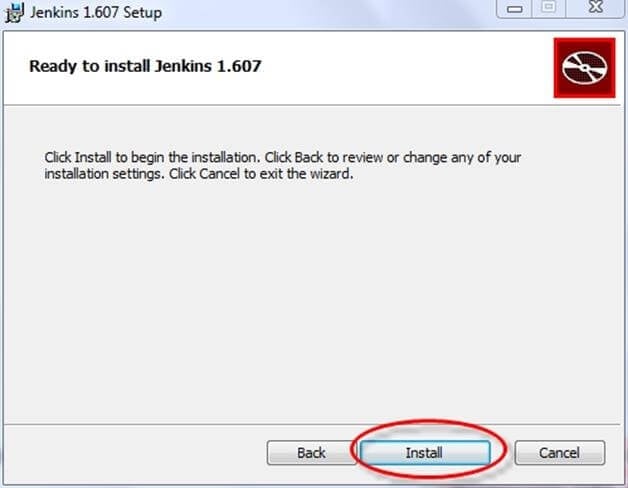
To install the Jenkins 1.607 setup, click the Next button on the installation page.
To begin the installation process, tap Install in the end.
Step 2: Creating a CI Job
On the Jenkins dashboard, click the New Item option to create a CI job
.
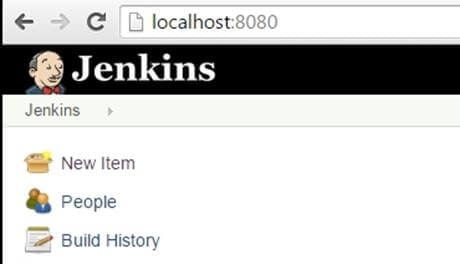
And select the Maven Project from the list.
Upon clicking the OK button, a new job under the specified (WebdriverTest) will be created.
Step 3: Managing Jenkins
Go to Manage Jenkins on the Jenkins dashboard and choose Configure System.
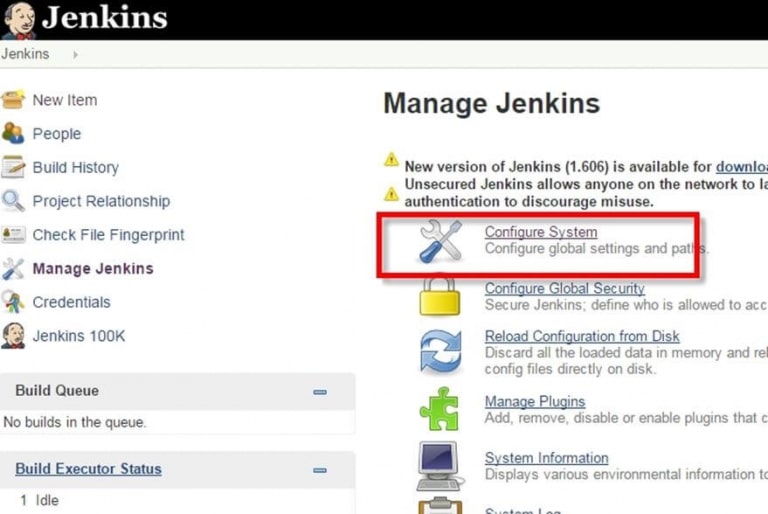
Now configure the JDK installations as shown in the below image.

Step 4: Executing Project from GitHub
Open Jenkins via launching a browser and tap the New Item option.
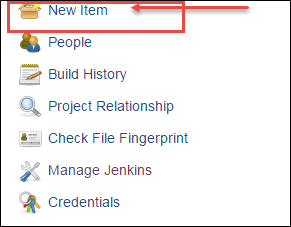
Select Maven Project from the list and specify the item name (magemintGitHub) and tap, OK.
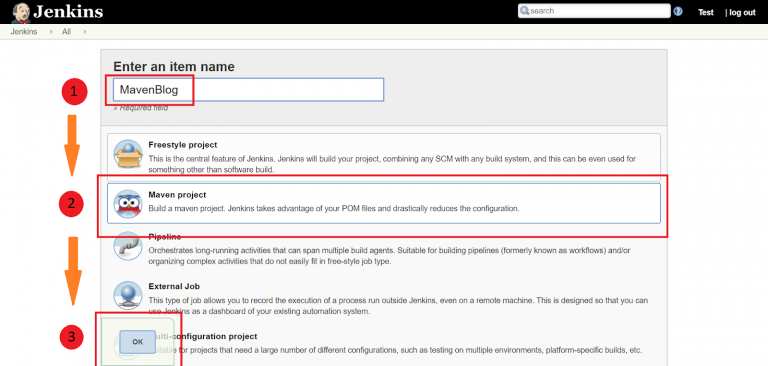

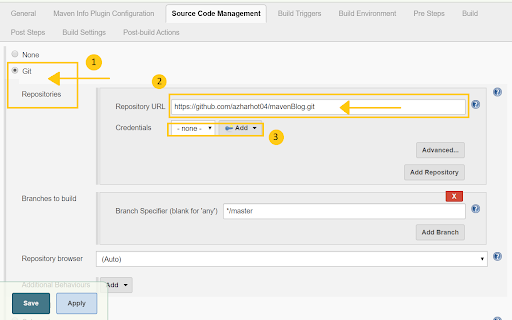
On Git, enter the specific repository url and tap, Add to include in the repository.
Enter pom.xml location in the Root POM and Clean Test in the Goals and Options text boxes. Under the Post Steps row, select how to run the test and upon completion, tap Save.
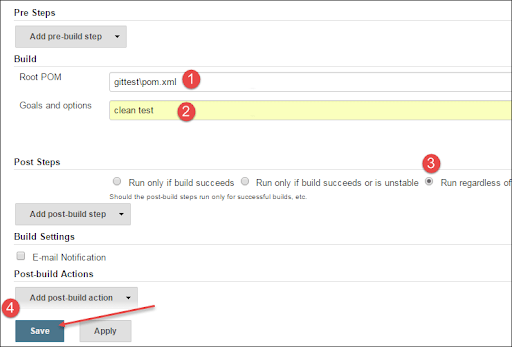
Post clicking the Save button, you’ll be directed to a below-shown image wherein tap Build Now to build your project.
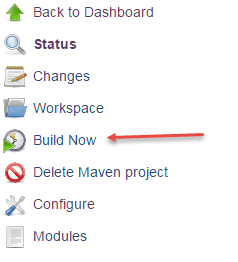
Next tap the Build Now for further configuration.

Step 5: Verifying the Output
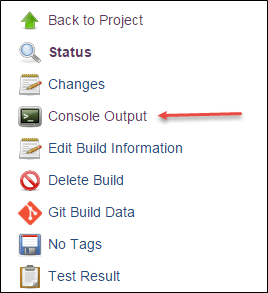
Then from the newly directed page, select Console Output to verify the output status.
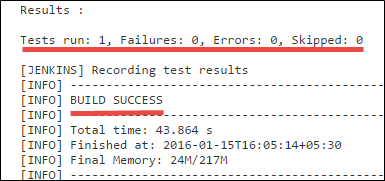
Thus, from the Results page, we can verify the build is successfully executed.
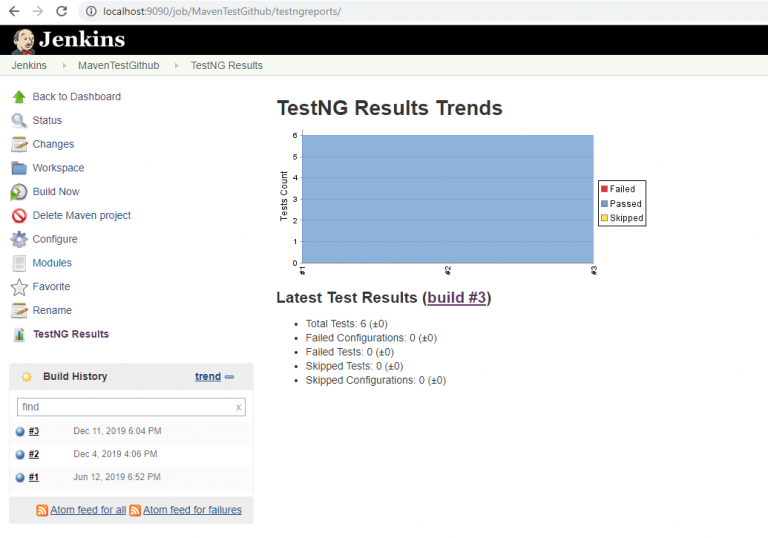
The final output of the TestNG results is shown in the below image.
Extending the functionality of Jenkins with Blue Ocean:
Jenkins is a more popular automation server among the developing and testing community. The reason behind this popularity is that Jenkins is a stable and reliable tool which act like a mature continuous integration server. One such adding feather for Jenkins is it’s newly developed Blue Ocean project. The perks of this project are that it facilitates in extending the functionalities of Jenkins pipelines to a remarkable extent. Let us now explore this newcomer.
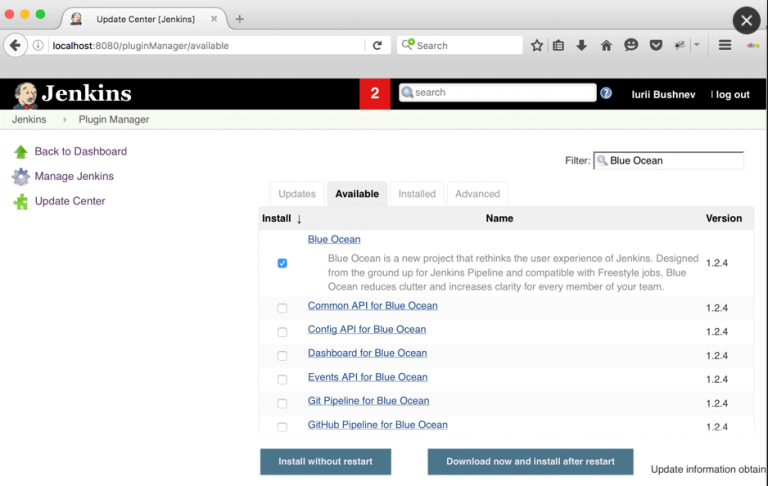
It is important for you to install all the required plug-ins for the installation of the Blue Ocean. To do so, go to Manage Jenkins>>Manage Plugins>>Available>> search, Blue Ocean.
You can confirm the successful installation of Blue Ocean by the presence of ‘Open Blue Ocean’ icon in the left panel.

In the inside view of Blue Ocean, all your newly created automation tests pipeline can be overlooked and the status such as results of completed phases, operations in progress, and other related logs will be listed out. If needed, you can export your required logs too.
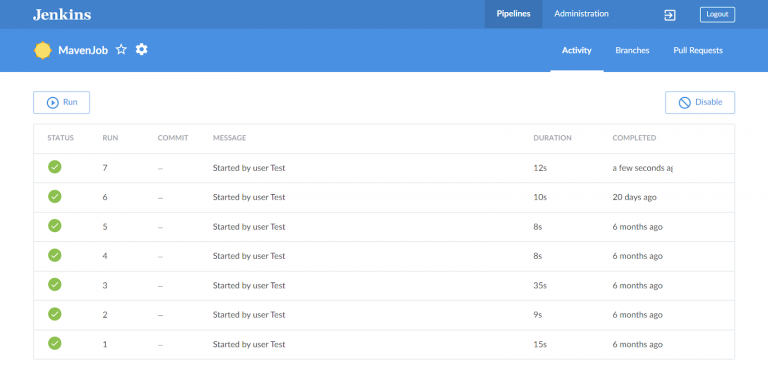
The GUI of this newly developed project comes up with an intuitive interface and is extensively user-friendly. For example, one of the phases called UI Tests has been added with an additional ability to run for different browsers like Chrome, Edge, Firefox and Safari.
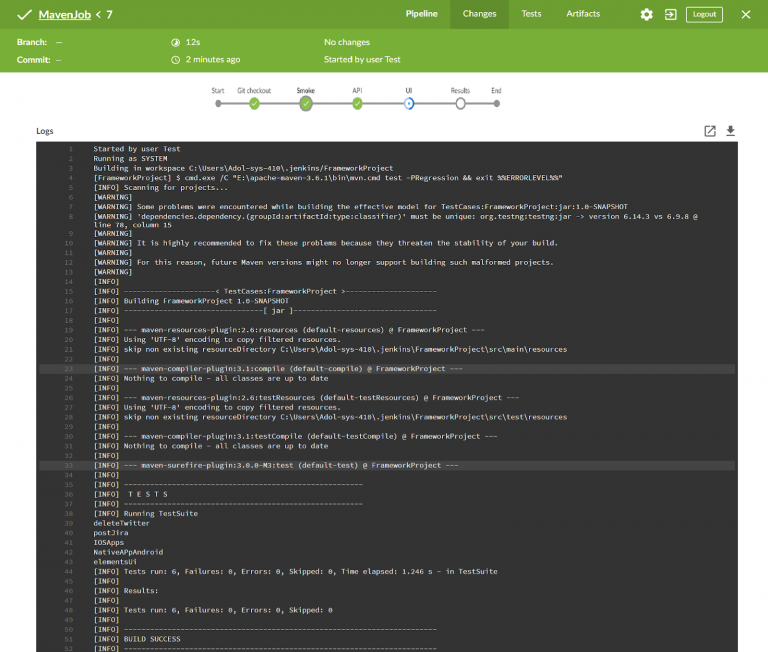
Thus, you have successfully installed the additional project, Blue Ocean with its clarity-rich interface with Jenkins pipelines.