Reading Time: 5 mins.
What is Jenkins?
Jenkins is an open-source and automation tool primarily used for the implementation of Continuous Integration and Continuous Delivery/Deployment. Being written using the Java language, it can be integrated with a number of testing and deployment technologies. It is a powerful application that comes up with more than 1000 plugins that supports building, testing, deploying and documenting the software of all kinds of projects. Further, Jenkins is reputed for its reliability and constituted to be one of the largest support communities that makes the possibility of stable release every three months.
Advantages of using Jenkins
Ease of installation:
Being a self-contained Java-specific application, it supports various operating systems such as Windows, Mac OS X and other Unix-based systems.
Easy Configuration:
With the help of a user-friendly and robust web interface, it is literally very easy to set up and perform the Jenkins configuration.
Plugins:
Jenkins can do a lot more functionalities than it expected to. With the benefit of its extended architecture, it’s possible to integrate with a number of applications via plugins.
Distributed:
Yet another perk of Jenkins is the capability to distribute work across multiple machines and thereby, assisting in faster build, test and deployment activities.
How Jenkins plays a major role in the CI/CD pipeline?
Jenkins plays a pivotal role in the integration and delivery process and it provides support for most of the languages and source code repositories. Though it doesn’t help in getting rid of the script writing for each individual step, it offers a robust and faster integration in terms of building, testing and deployment tools. Jenkins makes it possible by enabling automation for pretty much every major development task.
DevOps routine before and after using Jenkins:
CI/CD without Jenkins
The practice is that everyone in the software development process tends to carry out the testing activities only after the entire source code was built. This affirms that the building process happened for only once. It is unhealthy because detecting and fixing bugs post the building process is a resource-heavy and time consuming work which in turn slows down the delivery process. As a result, the developers have to wait to get the test results as the whole process is performed manually.
CI/CD with Jenkins
In contradiction, building and testing was performed for each and every commit that was made. This allows the developers to spare their time on that specific commit instead of some menial tasks. Due to the rapid and continuous testing activities, frequent release of new softwares is possible. Thus, the only task left for developers is to rapidly commit the source code changes as Jenkins will automate the rest of the process. Also, it allows the developers to get instant updates about the test result (on the run) for every commit that is made in the source code.
Installing Jenkins on Ubuntu 18.04
Step 1: Prerequisites
For the installation of Jenkins, you need to fulfill certain requirements. The prerequisites include,
- RAM: Min. 256 MB and recommended. 1 GB
- Drive Space: Min. 1 GB and recommended. 10 GB
- Since Jenkins runs on Java, you need either the latest version of Java Development Kit (JDK) or Java Runtime Environment (JRE).
Step 2: Installing Java
Since Jenkins is a Java application, you need to install Java first. If you haven’t installed java yet, follow the below commands to install it.
sudo apt update
sudo apt install openjdk-8-jdk
Step 3: Installing Jenkins
The default packages that come with Ubuntu may not be of the latest version. To overcome these issues, it is recommended to make use of the project-maintained packages for the installation of Jenkins.
To start the installation, include the repository key to your system and make sure that you have entered the latest stable version of the package.
sudo wget -q -O - https://pkg.jenkins.io/debian/jenkins.io.key | sudo apt-key add -
In your server’s sources.list, attach the repository address of the Debian package.
sudo sh -c 'echo deb http://pkg.jenkins.io/debian-stable binary/ > /etc/apt/sources.list.d/jenkins.list'
In order to start using the new repository, update the system with the following command.
sudo apt update
Then install jenkins and its dependencies with the following command,
sudo apt install jenkins
Now that the installation of Jenkins is done, let’s move forward to start Jenkins.
Step 4: Starting Jenkins
Jenkins can be started using many ways, to start jenkins using systemctl, run the command,
sudo systemctl start jenkins
To verify the status, run the following command.
sudo systemctl status jenkins
Output
jenkins.service - LSB: Start Jenkins at boot time
   Loaded: loaded (/etc/init.d/jenkins; generated)
   Active: active (exited) since Mon 2018-07-09 17:22:08 UTC; 6min ago
     Docs: man:systemd-sysv-generator(8)
    Tasks: 0 (limit: 1153)
   CGroup: /system.slice/jenkins.service
From the above output, it is now verified that Jenkins runs as expected, let’s now move towards the configuration of the firewall rules.
Step 5: Configuring the firewall rules
Use the ufw to open the default port 8080 on which Jenkins runs.
sudo ufw allow 8080
To check the ufw status with regard to its new rules, run the command,
sudo ufw status
Here in the output note that the traffic for port 8080 has been allowed from anywhere.
Output
Status: active
To                             Action              From
--                             ------              ----
OpenSSH                        ALLOW              Anywhere
8080                           ALLOW              Anywhere
OpenSSH (v6)                   ALLOW              Anywhere (v6)
8080 (v6)                      ALLOW              Anywhere (v6)
In cases of the firewall being inactive, use the below command to allow OpenSSH, sudo ufw allow OpenSSH
And to enable the firewall, use the command,
sudo ufw enable
Now that the firewall configuration for Jenkins have been successfully executed, setting up Jenkins is the next step.
Step 6: Setting Up Jenkins
You will get to see the following image in which the location of the initial password will be displayed.

To view the password, use the following cat command.
sudo cat /var/lib/jenkins/secrets/initialAdminPassword
Cut and paste the received alphanumeric password (of 32 characters) into your administrator field.
Post which you will be directed to the below-shown screen which presents you to install suggested plugins or selective ones.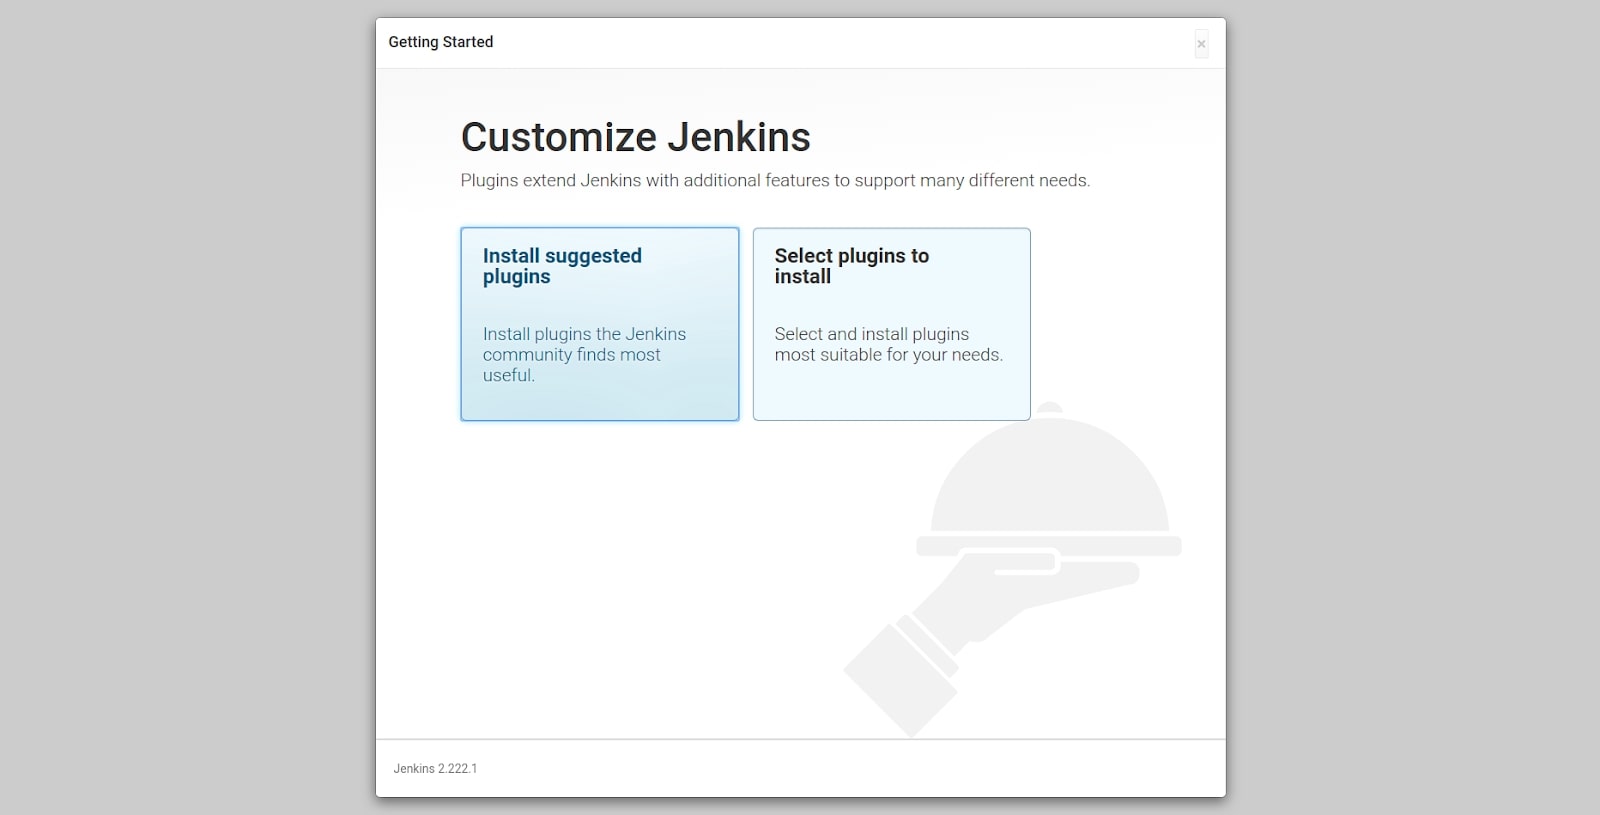
Select the option of your preferences to proceed with the installation process. 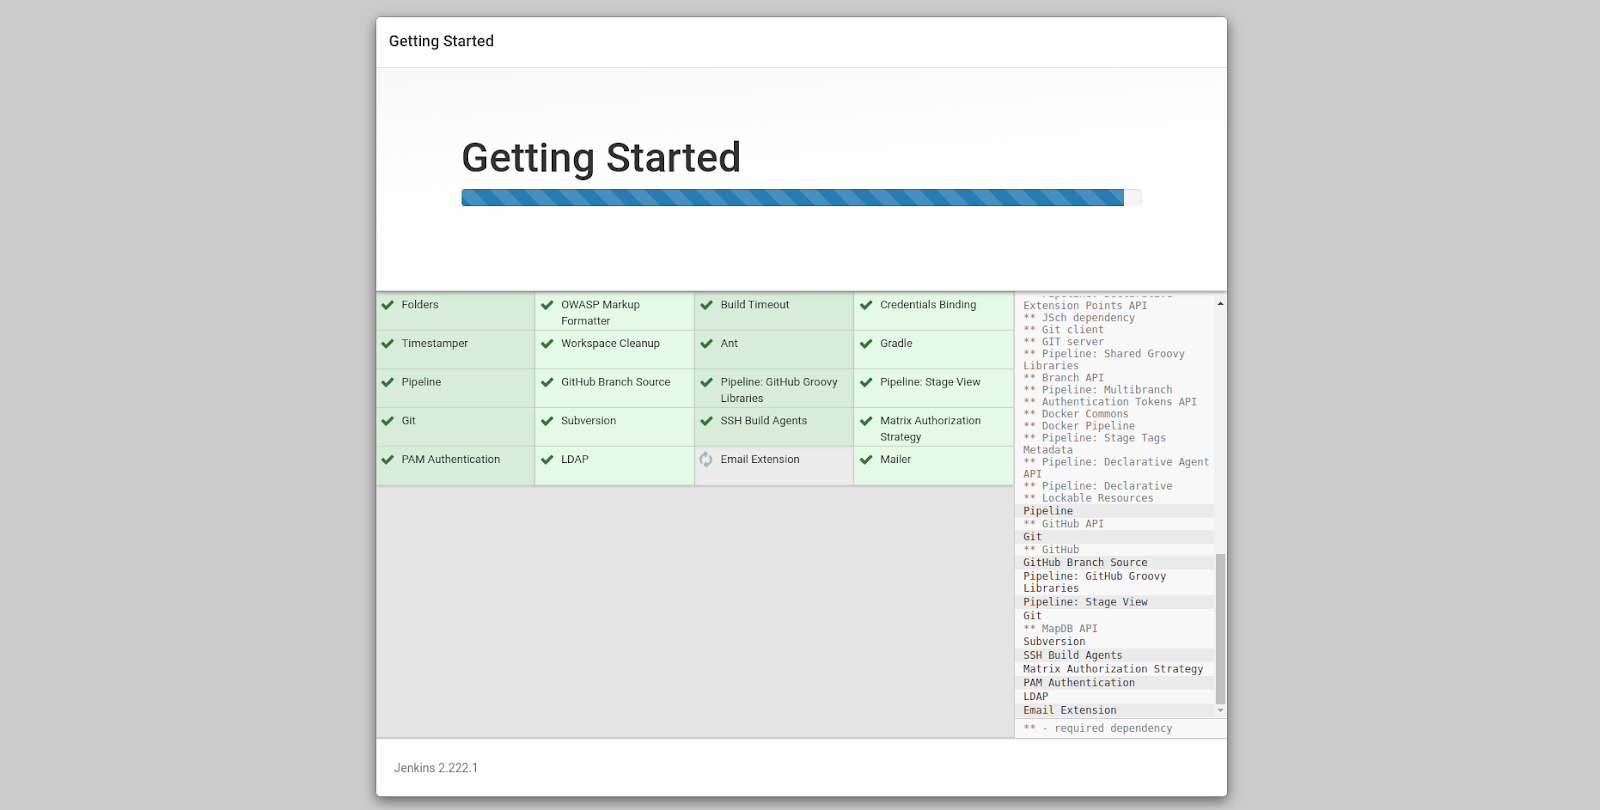
Soon the installation gets completed, the screen will prompt you to set up the first administrative user. It is recommended to take a moment to create the user, though you can skip the step with the admin’s initial password.
Provide your username, password and other required fields to create your first admin user. 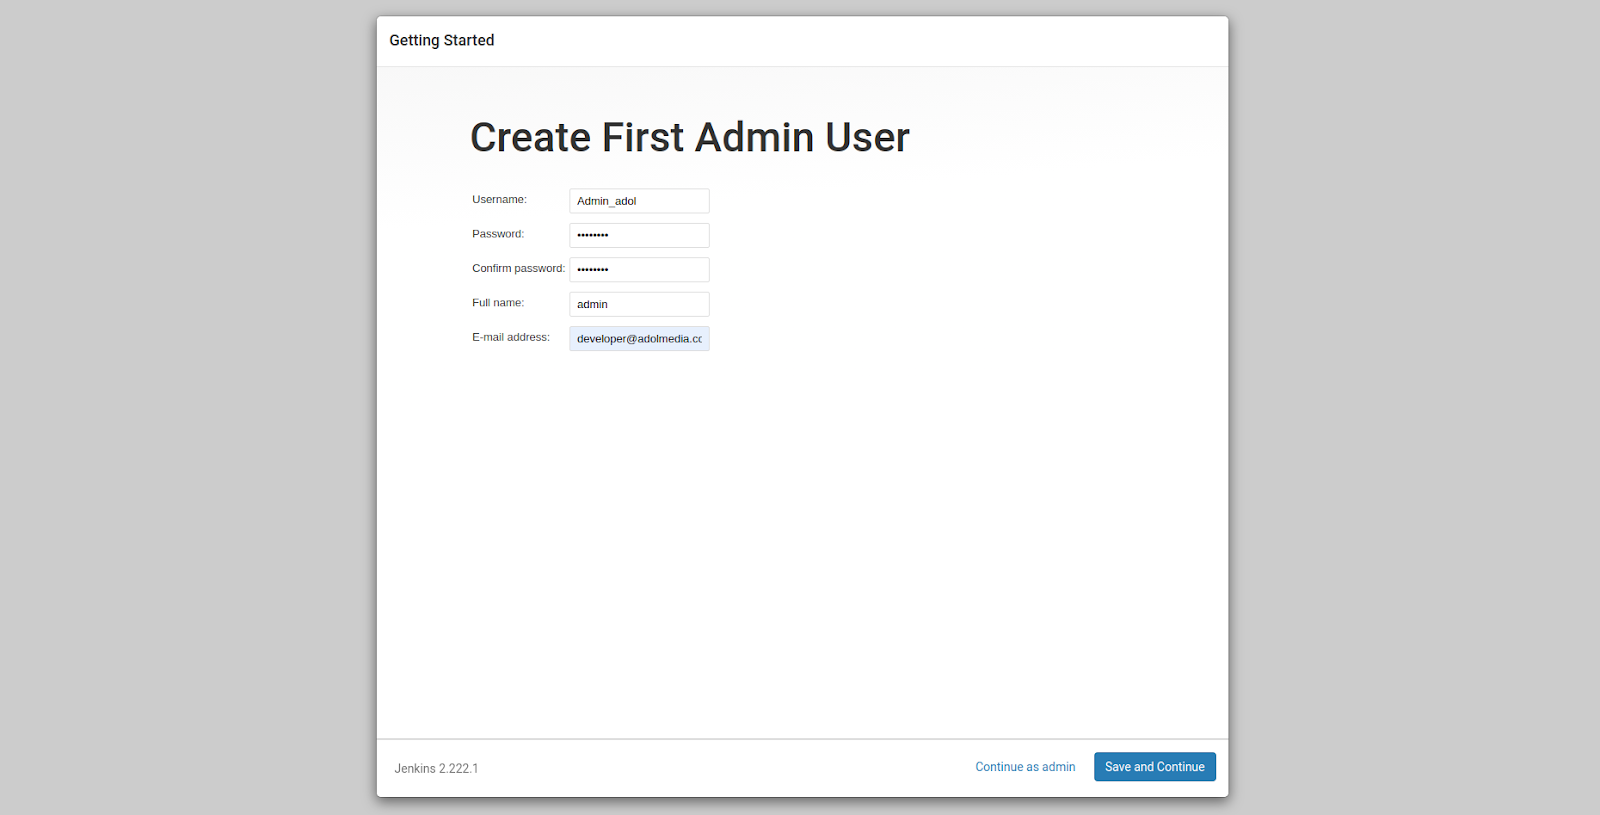
Again the Jenkins screen prompts you to the Instance Configuration Page, confirm it using your domain name or server’s IP address. 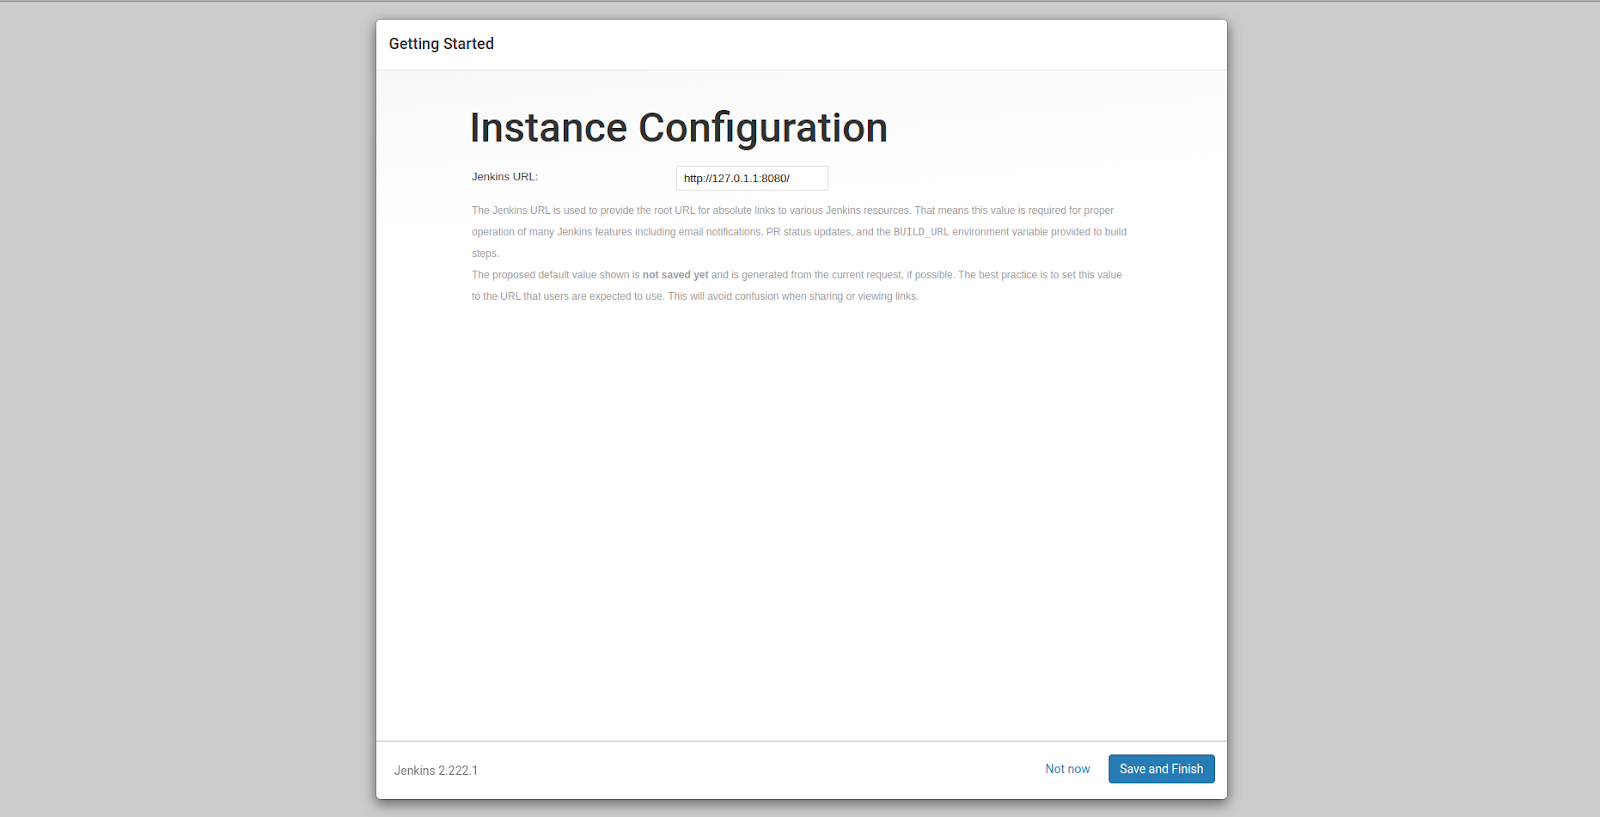
Click Save and Finish.
As shown in the below screenshot, you will see a confirmation page about the completion of Jenkins setup. 
Tap the Start Using Jenkins button to get into your Jenkins dashboard. 
As you have successfully made till the Jenkins dashboard, the installation process was over.
Final thoughts:
As a sum, you have gone through Jenkins introduction, its role in the CI/CD process and the steps involved in the installation process of Jenkins that includes updating the packages to the latest version, installing Java, starting of the Jenkins server, configuring the firewall rules and setting up Jenkins. Thus, it is all about the Jenkins installation process on Ubuntu 18.04 system.