Reading Time: 6 mins.
Overview:
The new release of Magento 2.4 on July 2020 comes with improvements to all the core functionalities (over 100 new fixes to the code, 30 security enhancements and resolution of 226 GitHub issues) that existed in the Magento 2.3.5 p1. To read the entire release notes, visit 2.4 Release Information. Over the years, most people install Magento 2.xx via web UI, but with Magento 2.4, you can only install it via Command Line Utility (CLI).
Prerequisites:
- To get to know the Magento 2.4 stack requirements, visit the following link: https://devdocs.magento.com/guides/v2.4/install-gde/system-requirements-tech.html
- Magento 2.4 supports both PHP 7.3 and 7.4. But it is recommended to use PHP 7.4 since PHP 7.3 hasn’t been tested completely.
- Make sure that you have upgraded your MySQL version to the latest MySQL 8 version as Magento 2.4 is tested with and supports MySQL 8.
Checking the requirements
Step 1: PHP version
To check the PHP version, type the command:
sudo php -v
Output
PHP 7.4.9 (cli) (built: Aug 7 2020 14:30:01) ( NTS )
Copyright (c) The PHP Group
Zend Engine v3.4.0, Copyright (c) Zend Technologies
with Zend OPcache v7.4.9, Copyright (c), by Zend Technologies
Note: Since PHP requires additional extensions for Magento, you can find them in the below link: https://devdocs.magento.com/guides/v2.4/install-gde/system-requirements-tech.html
Step 2: Composer version
To check the composer version, type the command:
sudo composer
Output
/ ____/___ ____ ___ ____ ____ ________ _____
/ / / __ \/ __ `__ \/ __ \/ __ \/ ___/ _ \/ ___/
/ /___/ /_/ / / / / / / /_/ / /_/ (__ ) __/ /
\____/\____/_/ /_/ /_/ .___/\____/____/\___/_/
/_/
Composer version 1.10.5 2020-04-10 11:44:22
Note: As you check the composer version, confirm that you have the composer globally.
Step 3: Mysql version
To check the MySQL version, type the command:
sudo mysql -V
Output
Welcome to the MySQL monitor. Commands end with ; or \g.
Your MySQL connection id is 9
Server version: 8.0.21-0ubuntu0.20.04.4 (Ubuntu)
Copyright (c) 2000, 2020, Oracle and/or its affiliates. All rights reserved.
Oracle is a registered trademark of Oracle Corporation and/or its
affiliates. Other names may be trademarks of their respective
owners.
Reading history-file /root/.mysql_history
Type 'help;' or '\h' for help. Type '\c' to clear the current input statement.
mysql> exit
Writing history-file /root/.mysql_history
Bye
Step 4: Elasticsearch version
To check the Elasticsearch version, type the command:
sudo curl -XGET 'http://localhost:9200'
Output
{
"name" : "adoldev-HP-EliteBook-840-G2",
"cluster_name" : "elasticsearch",
"cluster_uuid" : "BOeHk29-Q2Gi5UbC-982JQ",
"version" : {
"number" : "7.9.0",
"build_flavor" : "default",
"build_type" : "deb",
"build_hash" : "a479a2a7fce0389512d6a9361301708b92dff667",
"build_date" : "2020-08-11T21:36:48.204330Z",
"build_snapshot" : false,
"lucene_version" : "8.6.0",
"minimum_wire_compatibility_version" : "6.8.0",
"minimum_index_compatibility_version" : "6.0.0-beta1"
},
"tagline" : "You Know, for Search"
}
Note: Magento 2.4 has removed MySQL from its catalog search engine, therefore Elasticsearch can only be used as the catalog search engine.
Preparing Magento contents
Magento can be installed via two ways.
- Using composer
- Using the downloaded zip/tar archives
If you want to download Magento using composer, use the below command:
sudo composer create-project --repository-url=https://repo.magento.com/ magento/project-community-edition
If you want to download using the archives, visit the following link, https://magento.com/tech-resources/download
Note: You can download it either with a sample data or without sample data but either way makes sure to choose the Magento version as 2.4.
Installing Magento
Navigate to the Magento downloaded directory and make sure you are not able to install using the web method as we are going with the CLI way. Update the necessary details as per your requirements on below code as shown in the demo.
sudo php bin/magento setup:install --base-url=http://mage-test.com/ \
--db-host=localhost --db-name=magento_demo --db-user=magento-demo --db-password=demo123 \
--admin-firstname=admin --admin-lastname=user --admin-email=user@example.com \
--admin-user=adminuser --admin-password=admin123  --language=en_US  \
--currency=USD --timezone=America/Chicago --use-rewrites=1 \
--search-engine=elasticsearch7 --elasticsearch-host=localhost \
--elasticsearch-port=9200
Note: Make sure you have already installed Elasticsearch since only then you can configure Elasticsearch during Magento installation. To get further information, visit the blog post on How to Install and Configure Elasticsearch on Ubuntu 20.04
After updating the necessary details, run the above code on the Magento webroot directory.
Step 1: Run the CLI installation command
Make sure you are in the Magento webroot directory. In case, you are not in the webroot directory, the following Magento CLI commands will not work. Also, don’t forget to assign permissions for the concerned directories.
sudo chmod -R 777 var pub app generated
After assigning the permission let’s start the installation
sudo php bin/magento setup:install --base-url=http://mage-test.com/ \
--db-host=localhost --db-name=magento_demo --db-user=magento-demo --db-password=demo123 \
--admin-firstname=admin --admin-lastname=user --admin-email=user@example.com \
--admin-user=adminuser --admin-password=admin123  --language=en_US  \
--currency=USD --timezone=America/Chicago --use-rewrites=1 \
--search-engine=elasticsearch7 --elasticsearch-host=localhost \
--elasticsearch-port=9200
Step 2: Let’s verify Magento Installation
Since it is impossible to display the full output. Here, we have attached the initial and end sections of the output.
Output 1
sudo php bin/magento setup:install --base-url=http://mage-test.com/ \
> --db-host=localhost --db-name=magento_demo --db-user=magento-demo --db-password=demo123 \
> --admin-firstname=admin --admin-lastname=user --admin-email=user@example.com \
> --admin-user=adminuser --admin-password=admin123  --language=en_US  \
> --currency=USD --timezone=America/Chicago --use-rewrites=1 \
> --search-engine=elasticsearch7 --elasticsearch-host=localhost \
> --elasticsearch-port=9200
Starting Magento installation:
File permissions check...
[Progress: 1 / 1282]
Required extensions check...
[Progress: 2 / 1282]
Enabling Maintenance Mode...
[Progress: 3 / 1282]
Installing deployment configuration...
[Progress: 4 / 1282]
Installing database schema:
Schema creation/updates:
Module 'Magento_AdminAnalytics':
[Progress: 5 / 1282]
Module 'Magento_Store':
[Progress: 6 / 1282]
Module 'Magento_AdobeIms':
[Progress: 7 / 1282]
Module 'Magento_AdobeImsApi':
[Progress: 8 / 1282]
Module 'Magento_AdobeStockAdminUi':
[Progress: 9 / 1282]
Module 'Magento_MediaGallery':
[Progress: 10 / 1282]
Module 'Magento_AdobeStockAssetApi':
[Progress: 11 / 1282]
Module 'Magento_AdobeStockClient':
[Progress: 12 / 1282]
Module 'Magento_AdobeStockClientApi':
[Progress: 13 / 1282]
Module 'Magento_AdobeStockImage':
[Progress: 14 / 1282]
Module 'Magento_Directory':
[Progress: 15 / 1282]
Module 'Magento_AdobeStockImageApi':
[Progress: 16 / 1282]
Module 'Magento_AdvancedPricingImportExport':
[Progress: 17 / 1282]
Module 'Magento_Theme':
Output 2
Module 'Dotdigitalgroup_Chat':
[Progress: 1266 / 1282]
Module 'Klarna_Core':
[Progress: 1267 / 1282]
Module 'Klarna_Ordermanagement':
[Progress: 1268 / 1282]
Module 'Klarna_Onsitemessaging':
[Progress: 1269 / 1282]
Module 'Klarna_Kp':
[Progress: 1270 / 1282]
Module 'PayPal_Braintree':
[Progress: 1271 / 1282]
Module 'PayPal_BraintreeGraphQl':
[Progress: 1272 / 1282]
Module 'Temando_ShippingRemover':
[Progress: 1273 / 1282]
Module 'Vertex_Tax':
[Progress: 1274 / 1282]
Module 'Vertex_AddressValidation':
[Progress: 1275 / 1282]
Module 'Yotpo_Yotpo':
[Progress: 1276 / 1282]
Enabling caches:
Current status:
Array
(
[layout] => 1
[block_html] => 1
[full_page] => 1
)
[Progress: 1277 / 1282]
Installing admin user...
[Progress: 1278 / 1282]
Caches clearing:
Cache cleared successfully
[Progress: 1279 / 1282]
Disabling Maintenance Mode:
[Progress: 1280 / 1282]
Post installation file permissions check...
For security, remove write permissions from these directories: '/var/www/public_html/app/etc'
[Progress: 1281 / 1282]
Write installation date...
[Progress: 1282 / 1282]
[SUCCESS]: Magento installation complete.
[SUCCESS]: Magento Admin URI: /admin_erzzqm
Nothing to import.
Note: Here, we have completed the Magento installation using CLI command and subsequently note down the admin URI to use it later.
Running Magento commands
Post the Magento installation, it’s necessary to run the below Magento CLI commands.
i) To upgrade your store when you install/update an extension:
sudo php bin/magento setup:upgrade
ii) To compile non-existent proxies and pre-compiles class definitions and much more:
sudo php bin/magento setup:di:compile
iii) To deploy static view files:
sudo php bin/magento setup:static-content:deploy -f
iv) To manage the reindexer:
sudo php bin/magento indexer:reindex
v) To manage cache:
sudo php bin/magento cache:flush
sudo php bin/magento cache:clean
Verification
Step 1: Adding your URI to etc hosts
To add your localhost URI to the etc host file, go to
sudo nano /etc/hosts
127.0.0.1 mage-test.com
Make sure you have the same URI in the respective server block either with Apache or Nginx server.
Note: In case, you use the live server, remember that you don’t need to add the URI in the etc host.
Navigate to the browser and hit the following uri: http://mage-test.com/.
Also, make sure that you have assigned permissions for the corresponding directories using the below command before hitting the uri.
sudo chmod -R 777 var pub app generated

We’ve configured Elasticsearch as a catalogue search engine while performing the Magento installation. Let’s check some of the products.

Navigate to the Magento admin panel, and log in to your admin account by passing the credentials.

Note: If you forgot your admin details, i.e. username and password, kindly check the Magento CLI installation command.
Soon after entering the login details, you will get to see the following error. For security reasons, they have enabled the 2-factor authentication for the Magento admin panel by default.

Disabling the 2-factor authentication can be done in two ways. One is by CLI method and the other one by Config.php.
If you go with CLI, type the following command:
sudo php bin/magento module:disable Magento_TwoFactorAuth
Or if you go with config.php
Open the config.php file located in app/etc/config.php
Wherein find the module and change the value to 0.
After disabling the module, you have to run the following commands:
sudo php bin/magento setup:upgrade
sudo php bin/magento setup:di:compile
Note: Make sure you assign the required permissions for the following directories.
sudo chmod -R 777 var pub app generated
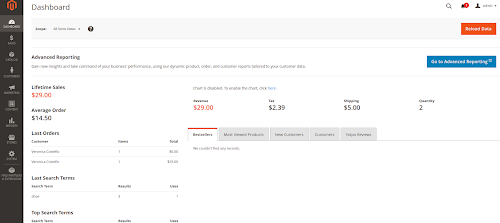
Next, you will be able to log into the Magento admin panel as shown below.
Now, let us check the catalog search engine to confirm whether Elasticsearch has been configured correctly (Optional).

Conclusion:
This article walked you through the installation procedures of Magento 2.4 on Ubuntu 20.04. Initially, you’ve been given a brief introduction about the new release of Magento version and the necessary technology stack. Since CLI is the only way to install Magento 2.4, you have seen the involved-steps in the installation process via Composer. Further, while performing the installation process, Elasticsearch has been configured as the Magento catalog search engine. Post running the Magento commands and verification, you could see the successful installation of Magento 2.4 with the seamless view and functionality of the admin dashboard.